Complete Student Notes, Strategies & Worked Example | 6092/03
Paper 3 40 marks | 1h 50 min
Planning (P) ~4–6 marks per question
Overall Paper 3 = 20% of O Level
Syllabus 6092 (Pure Chemistry)
Section 1: What is Planning in O Level Chemistry?
Planning questions test your ability to design a complete, logical chemical investigation from scratch. Unlike Biology, Chemistry planning is less about biological mechanisms and more about: choosing the right apparatus, using correct quantities with precise measurements, applying chemical knowledge (equations, molar calculations, expected observations), and showing how you would interpret results to reach a conclusion.
Chemistry Planning is different from Biology Planning: You must always include specific masses/volumes (with units), name the specific instrument used to measure each quantity, state expected observations, and show any necessary molar calculations. Vague answers like ‘add some acid’ score zero.
The Four Pillars of Every Chemistry Planning Answer
Pillar
What It Requires
Mark Value
1. Variables
State IV (what you change), DV (what you measure), and CVs (what you keep constant) with specific quantities
1 mark
2. Procedure
Numbered steps with: specific apparatus, specific masses/volumes, method of measurement, expected observations
1–2 marks
3. Calculations / Treatment of Results
Show how the measurements are used to calculate the answer or compare results, with equations and units
1–2 marks
4. Conclusion
State clearly how results are interpreted to answer the investigation question
1 mark
Key O Level Chemistry Rule: Always use mass, volume, or concentration — NEVER ‘amount’. Use specific instrument names: ‘electronic balance’, ‘measuring cylinder’, ‘gas syringe’, ‘burette’. Quantities must be specific and reasonable.
Section 2: The Three Types of Chemistry Planning Questions
O Level Chemistry planning questions fall into three broad types. Recognising the type immediately tells you what the DV is, what apparatus you need, and what your calculation/conclusion looks like.
Type A: Rate of Reaction Investigations
You investigate how a factor (temperature, concentration, surface area, catalyst) affects how fast a reaction proceeds.
Feature
Details
Typical IVs
Temperature / °C, concentration of acid / mol dm⁻³, particle size (powder vs chips), presence/absence of catalyst
Typical DVs
Time for reaction to complete (disappearing cross / colour change) / s; volume of gas collected / cm³ in fixed time; initial rate of gas production
Key CVs
Same mass/volume of reactant; same concentration of other reagent; same temperature (if not the IV); same total volume of solution
Measurement
Stopwatch for time; gas syringe for volume; electronic balance for mass
Conclusion
Lower time = higher rate. Higher volume of gas in fixed time = higher rate. Draw graph of rate vs IV; steeper gradient = greater effect.
Calculating rate: Rate = volume of gas (cm³) / time (s) OR Rate = 1 / time (s⁻¹). Use rate (not just time) as your DV when you want to show ‘how fast’.
The full set of notes, which includes sections such as Types of Chemistry Planning Questions, is available in hard copy for students who sign up for any of our regular practical lessons, Crash Courses or Mock Exams.
LOOKING FOR THE BEST PLACE TO DO YOUR SCIENCE PRACTICALS? JOIN US!
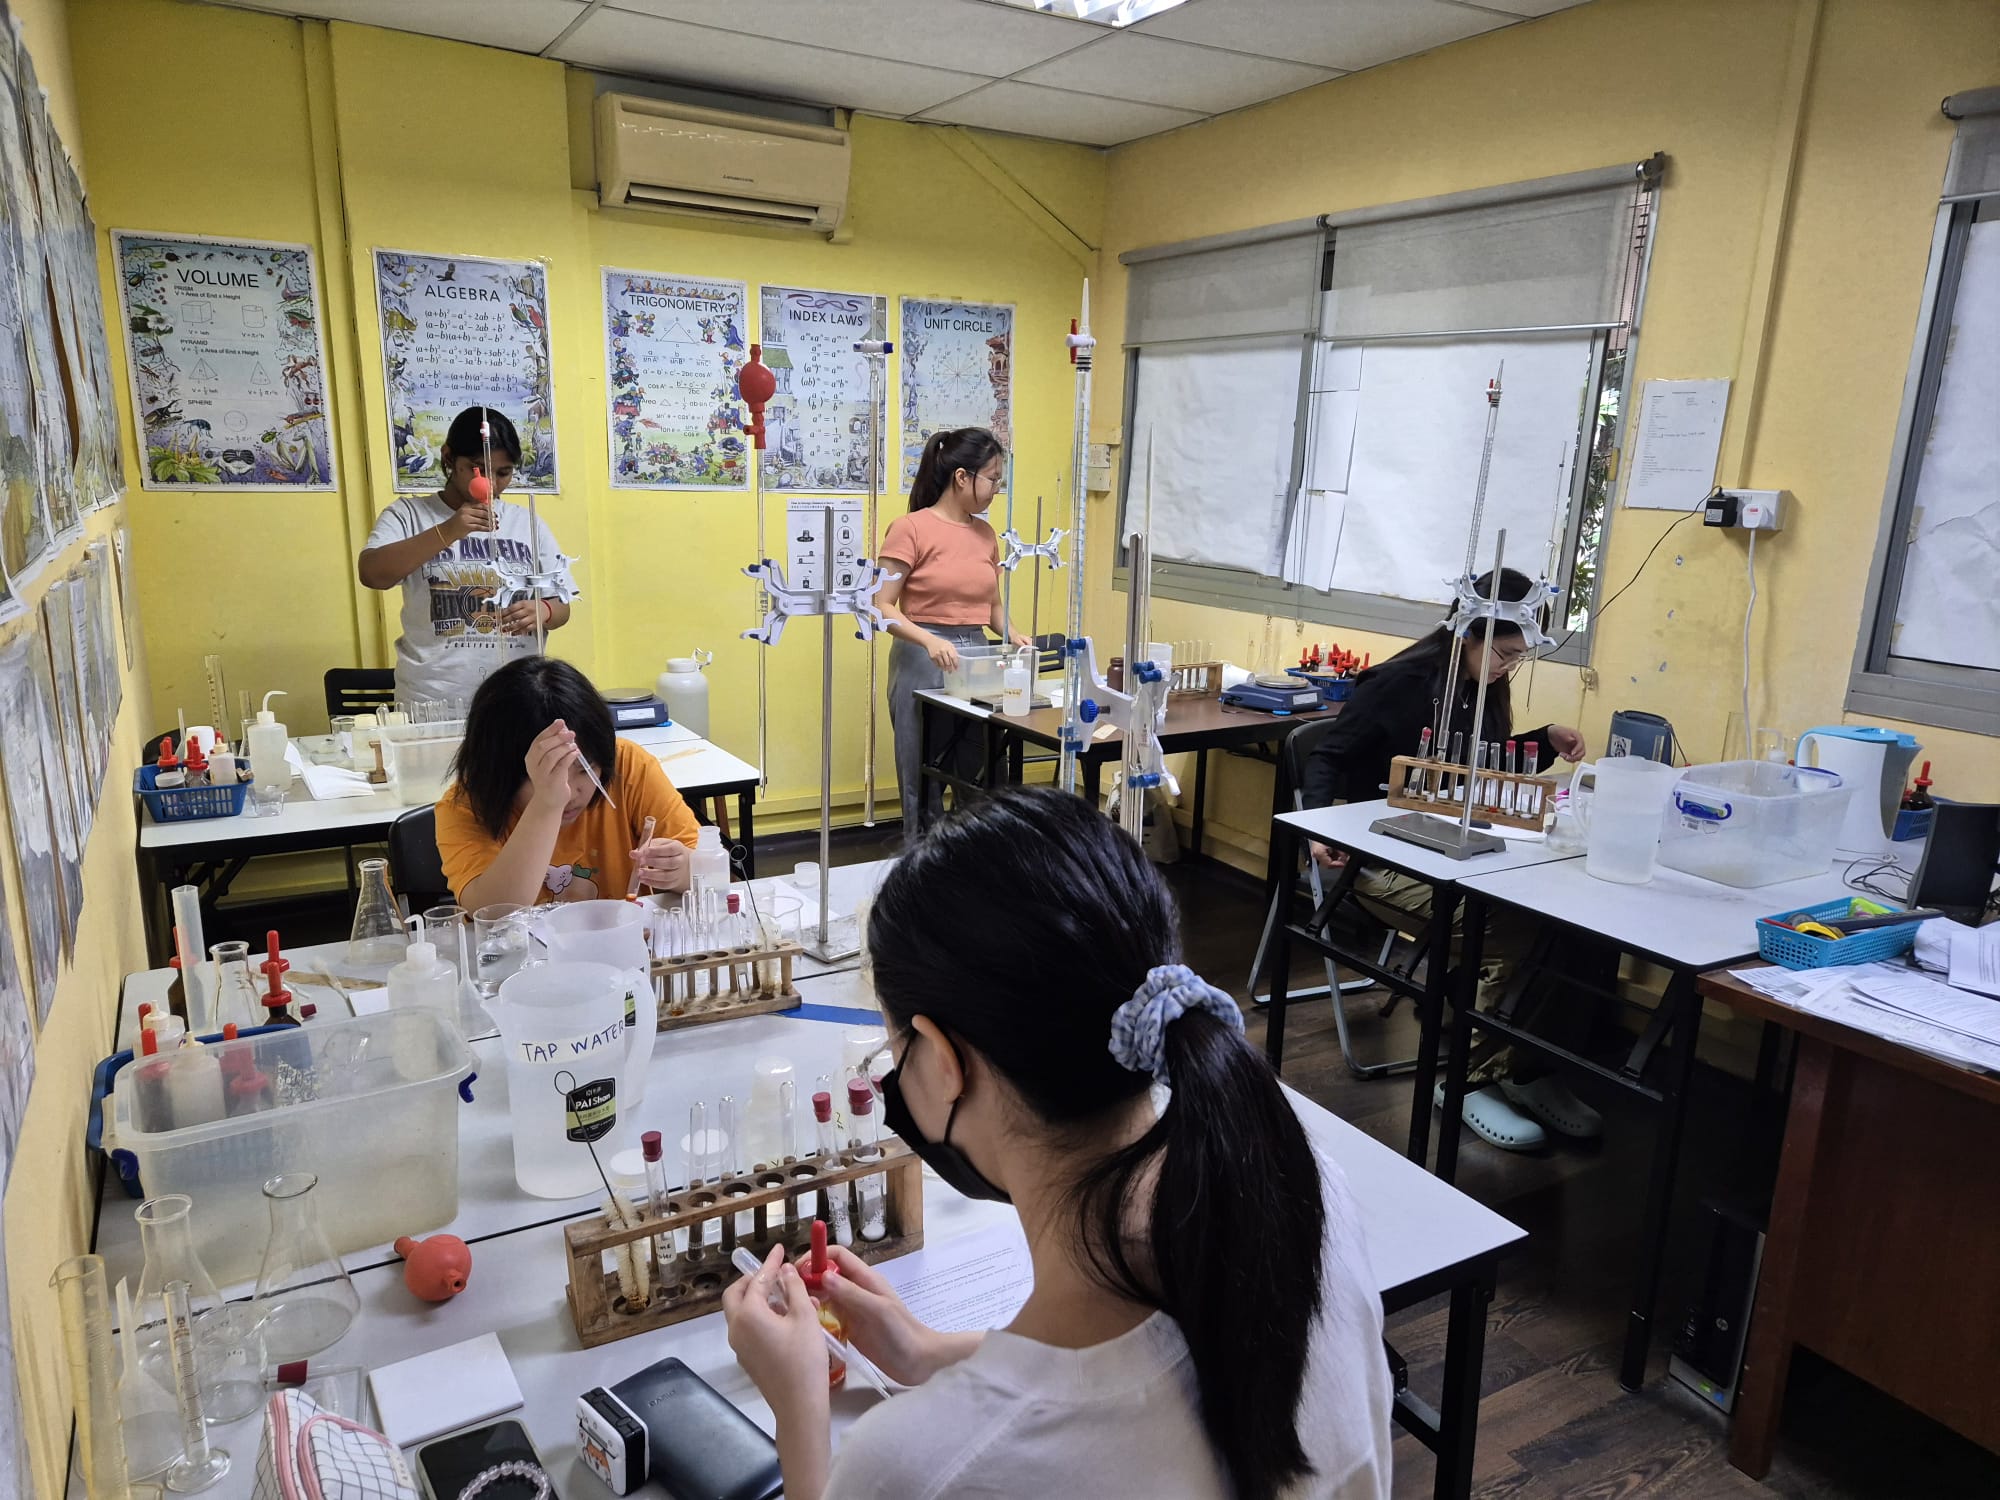
Singapore Learner has been a Comprehensive Science Practical Training provider since 2017.
As at 19 Apr 2026, we have trained about 1060 students for their science practical exams and we have conducted a total of about 4044 lab sessions.
Our laboratory apparatus are exam-grade and similar to those used in MOE schools and our chemicals are all NEA-approved.
We provide A-Level / H2 / IP and O-Level Physics, Chemistry, Biology and CombinedScience (Physics/Chemistry/Biology) PracticalTraining/Crash Course/Mock Exams for both local (eg. H2, Singapore-Cambridge) and international exams (CIE, Pearson Edexcel, IGCSE).
Why Choose Us?
Our teachers are very experienced, and we actually TEACH you good practical techniques.
We have been a one-stop comprehensive science practical centre providing solid practical training for ALL THREE sciences and for all levels and streams since 2017.
Our laboratory apparatus are exam-grade and similar to those used in MOE schools and our chemicals are all NEA-approved.
We have a structured practical training programme catering to the needs of both beginners and experienced students.
We have a small class size so that the teacher is able to observe the actions of each student more closely and demonstrate the correct practical techniques where and when necessary.
Many private schools trust us to prepare and conduct science practical training and assessment for their students, including structured training, mock exams and even actual CIE science practical exams.
O LEVEL PURE PHYSICS Paper 3 Practical — Planning (P)
Paper 3
Planning (P)
Overall
Syllabus
40 marks │ 1h 50 min
~5–6 marks per planning question
Paper 3 = 20% of O Level
6091 (Physics)
Section 1: What is Planning in O Level Physics?
Planning questions test your ability to design a complete, logical physics investigation from scratch. Unlike open-ended experiments, a planning question gives you a proposed relationship between two quantities and asks you to design an experiment to verify it or find constants within it.
Physics Planning: You must always state clearly how you will measure each physical quantity, name the specific instrument, state how to control other variables, and describe how to extract a constant from a graph. Vague answers like ‘measure the voltage’ with no mention of instrument or method score zero.
The Four Pillars of Every Physics Planning Answer
Pillar
What It Requires
Mark Value
1. Variables
State IV (what you change), DV (what you measure), and CVs (what you keep constant) — with specific quantities and symbols
1 mark
2. Procedure
Numbered steps describing: specific apparatus, how IV is changed, how DV is measured, how many readings to take
2–3 marks
3. Graph & Analysis
State the graph to plot, what gradient and intercept represent, and how to find the unknown constant from the graph
1–2 marks
4. Additional Detail
Safety precautions linked to specific hazards, and accuracy improvements specific to this experiment
1 mark
Key O Level Physics Rule: Always use the same symbols as the equation given in the question. Write variables explicitly as ‘the independent variable is [symbol], which is [quantity].’ Measurements must be linked to a named instrument. Equations must be linearised step-by-step before stating the graph.
Section 2: The Three Types of Physics Planning Questions
O Level Physics planning questions fall into three broad types. Recognising the type immediately tells you what the DV is, what apparatus you need, and how to linearise the equation.
Type A: Electrical Circuit Investigations
You investigate how a circuit component (resistor, LDR, thermistor, capacitor) behaves as one electrical quantity is varied.
Feature
Details
Typical IVs
Distance from a light source / cm; temperature / °C; resistance / Ω; voltage / V; time / s
Typical DVs
Current I / A; voltage V / V; resistance R / Ω; charge Q / C; count rate
Key CVs
Supply voltage; other resistances in circuit; temperature of environment; light intensity of surroundings
Measurement
Voltmeter across component; ammeter in series; ohmmeter or calculate R = V/I; ruler for distance
Conclusion
Plot suitable graph (e.g. R against d); gradient or intercept gives the unknown constant
Calculating Resistance: R = V / I. If measuring voltage across LDR (V_L) and voltage across fixed resistor (V_AB) with known R: current I = V_AB / R. Then R_LDR = V_L / I. Always state which voltmeter reading you are using.
The full set of notes, which includes sections such as Step-by-Step Formula is available in hard copy for students who sign up for any of our regular practical lessons, Crash Courses or Mock Exams.
LOOKING FOR THE BEST PLACE TO DO YOUR SCIENCE PRACTICALS? JOIN US!
Singapore Learner has been a Comprehensive Science Practical Training provider since 2017.
As at 19 Apr 2026, we have trained about 1060 students for their science practical exams and we have conducted a total of about 4044 lab sessions.
Our laboratory apparatus are exam-grade and similar to those used in MOE schools and our chemicals are all NEA-approved.
We provide A-Level / H2 / IP and O-Level Physics, Chemistry, Biology and CombinedScience (Physics/Chemistry/Biology) PracticalTraining/Crash Course/Mock Exams for both local (eg. H2, Singapore-Cambridge) and international exams (CIE, Pearson Edexcel, IGCSE).
Why Choose Us?
Our teachers are very experienced, and we actually TEACH you good practical techniques.
We have been a one-stop comprehensive science practical centre providing solid practical training for ALL THREE sciences and for all levels and streams since 2017.
Our laboratory apparatus are exam-grade and similar to those used in MOE schools and our chemicals are all NEA-approved.
We have a structured practical training programme catering to the needs of both beginners and experienced students.
We have a small class size so that the teacher is able to observe the actions of each student more closely and demonstrate the correct practical techniques where and when necessary.
Many private schools trust us to prepare and conduct science practical training and assessment for their students, including structured training, mock exams and even actual CIE science practical exams.
Planning questions in O Level Biology Paper 3 ask you to design a complete biological experiment to investigate a stated effect. They are worth 5 marks and test four core skills: identifying variables, describing a clear procedure, explaining how data leads to a conclusion, and assessing risks.
Key difference from H2: O Level Planning questions are more concise — typically 5 marks — but you still need all the same components. Every mark is attached to a specific component. Missing one component = losing a mark.
What Every Planning Answer Must Cover
Component
What Examiners Expect
Marks at Stake
Independent Variable (IV)
Clearly named with units. Must be the factor you deliberately change.
1
Dependent Variable (DV)
Clearly named with how it is measured and units.
Controlled Variables
At least 2 variables kept constant, each with a method of control. One mark for naming + method.
1
Step-by-step Procedure
Clear, numbered steps that another person could follow. Include quantities, volumes, timings.
1
Data / Conclusion
How results will be recorded (table), presented (graph) and interpreted to answer the research question.
1
Control Experiment
Replacement setup described with purpose stated. (Often embedded in procedure mark.)
Safety Precaution
Specific hazard + specific precaution. Often 1 mark available.
1
O Level Reality Check: A 5-mark planning question typically allocates marks as: IV+DV [1], CVs [1], Procedure [1], Data/Conclusion [1], Control or Safety [1]. Always verify by re-reading the question’s bullet points.
Section 2: The 5-Step Formula for a Perfect O Level Plan
Use this structure every time. Examiners follow a mark scheme checklist. Organise your answer with numbered headings so each component is immediately visible.
Step 1: State the Independent and Dependent Variables
Always begin by explicitly naming both variables with their units. Do not make the examiner guess.
FORMAT: “Independent variable (IV): [Factor you change] / [unit]. Dependent variable (DV): [What you measure] / [unit].”
Common IV–DV pairs for O Level topics
Topic
Independent Variable (IV)
Dependent Variable (DV)
Enzymes
Temperature / °C, pH, enzyme/substrate concentration / %
Time taken for reaction / s OR rate of reaction / s⁻¹
Photosynthesis
Light intensity (distance of lamp / cm), CO₂ conc. / %, temperature / °C
Number of bubbles / min OR time for indicator colour change / s
Respiration (yeast)
pH, temperature / °C, glucose concentration / %
Volume of CO₂ gas collected / cm³ per min OR height of froth / mm
Osmosis
Concentration of sucrose / salt solution / mol dm⁻³
Change in length / mass of plant tissue / mm or g
Transpiration
Wind speed (fan on/off), humidity, temperature / °C, light intensity
Rate of water uptake by potometer / cm³ min⁻¹
The full set of notes, which includes sections such as Topic–Specific Planning Tips is available in hard copy for students who sign up for any of our regular practical lessons, Crash Courses or Mock Exams.
LOOKING FOR THE BEST PLACE TO DO YOUR SCIENCE PRACTICALS? JOIN US!
Singapore Learner has been a Comprehensive Science Practical Training provider since 2017.
As at 19 Apr 2026, we have trained about 1060 students for their science practical exams and we have conducted a total of about 4044 lab sessions.
Our laboratory apparatus are exam-grade and similar to those used in MOE schools and our chemicals are all NEA-approved.
We provide A-Level / H2 / IP and O-Level Physics, Chemistry, Biology and CombinedScience (Physics/Chemistry/Biology) PracticalTraining/Crash Course/Mock Exams for both local (eg. H2, Singapore-Cambridge) and international exams (CIE, Pearson Edexcel, IGCSE).
Why Choose Us?
Our teachers are very experienced, and we actually TEACH you good practical techniques.
We have been a one-stop comprehensive science practical centre providing solid practical training for ALL THREE sciences and for all levels and streams since 2017.
Our laboratory apparatus are exam-grade and similar to those used in MOE schools and our chemicals are all NEA-approved.
We have a structured practical training programme catering to the needs of both beginners and experienced students.
We have a small class size so that the teacher is able to observe the actions of each student more closely and demonstrate the correct practical techniques where and when necessary.
Many private schools trust us to prepare and conduct science practical training and assessment for their students, including structured training, mock exams and even actual CIE science practical exams.
A source-of-error question is not asking you to list everything that could go wrong — it wants the ONE or TWO factors that are inherent to this particular procedure/apparatus and would cause a genuine, unavoidable error in the final result. Structure every answer in two parts:
Part 1 — What is the source of error? Be specific: name the apparatus/step and the physical reason the reading is not exact.
Part 2 — How does it affect the result? State which quantity is affected, and whether it becomes larger than, smaller than, or larger/smaller than its true value.
Do NOT accept these as answers unless you can justify them further — examiners routinely reject them as “too general”:
Parallax error (only acceptable if you specify why parallax cannot be avoided in this exact set-up)
Random error / human error (on its own)
Zero error of an instrument (this is correctable by calibration, not a key source of error)
Anything fixed simply by “being more careful” or “repeating the reading”
1.1 Random Error vs Systematic Error
Source of Error
Effect on the Reading / Result
Precaution / Improvement
Random Error
Unpredictable scatter, in either direction, caused by limits of precision or the experimenter’s inability to repeat a measurement identically. E.g. repeating a mass reading gives 17.46 g, 17.42 g, 17.44 g.
Take repeated readings and average; take more data points for a graph so the best-fit line averages out the scatter.
Systematic Error
A consistent bias in one direction throughout the whole experiment, usually from a fault in the apparatus or method. E.g. a stretched tape measure makes every length reading too small.
Cannot be reduced by averaging. Must identify the faulty apparatus/method and correct or recalibrate it (e.g. account for zero error, use a different instrument).
1.2 Quick-Reference: Precision of Common Apparatus
Apparatus
Precision (Uncertainty)
How to Read / Use Correctly
Metre rule / half-metre rule
0.1 cm
Read to the smallest division; eye vertically above the scale.
Ammeter (0–1 A)
0.01 A
Read to half the smallest division (0.02 A ÷ 2).
Voltmeter (0–3 V / 0–5 V)
0.05 V
Read to half the smallest division.
Laboratory thermometer
0.5 °C
Read to half the smallest division; last digit 0 or 5.
Stopwatch (digital)
0.01 s
Record to 2 d.p. unless told otherwise.
Protractor
1°
Read to the smallest division.
Measuring cylinder (100 ml)
0.5 cm³
Read at eye level, bottom of meniscus.
Spring balance (0–1 N)
0.01 N
Check for zero error before use.
Spring balance (0–10 N)
0.1 N
Check for zero error before use.
Digital micrometer / calipers
0.01 mm / 0.01 cm
Close jaws gently; check zero error.
Electronic mass balance
0.01 g
Tare (zero) before every measurement.
2. Mechanics
2.1 Period of Oscillation (Simple Pendulum)
Source of Error
Effect on the Reading / Result
Precaution / Improvement
The thread is slightly elastic, or slips through the split cork.
The effective length l of the pendulum is not what was recorded, so T is inaccurate.
Measure and re-check l just before each timing; use an inextensible thread.
Reaction time in starting/stopping the stopwatch is significant compared to the period of one oscillation.
T is either larger or smaller than the true value — the error is a larger fraction of the result for short single-oscillation timings.
Time a large number of oscillations (e.g. 20) and divide by 20, so the fixed reaction-time error is spread over many swings and becomes negligible per oscillation.
The bob does not swing in one vertical plane (it swings elliptically) or amplitude is too large.
The period recorded is not the true period for small-angle oscillation.
Release the bob with a small amplitude and check it swings in a single plane; restart if it drifts.
The reference point used to judge “one complete oscillation” is not fixed.
Miscounting oscillations changes T.
Use the lowest point of the swing (highest speed, easiest to judge) as the reference point for counting.
Standard technique justification: measuring 20 oscillations and dividing by 20 divides the (constant) human reaction-time error by 20, greatly reducing its effect on the value of one period T.
The full set of notes, which includes sections such as Sources of Error by Practical Topic is available in hard copy for students who sign up for any of our regular practical lessons, Crash Courses or Mock Exams.
LOOKING FOR THE BEST PLACE TO DO YOUR SCIENCE PRACTICALS? JOIN US!
Singapore Learner has been a Comprehensive Science Practical Training provider since 2017.
As at 19 Apr 2026, we have trained about 1060 students for their science practical exams and we have conducted a total of about 4044 lab sessions.
Our laboratory apparatus are exam-grade and similar to those used in MOE schools and our chemicals are all NEA-approved.
We provide A-Level / H2 / IP and O-Level Physics, Chemistry, Biology and CombinedScience (Physics/Chemistry/Biology) PracticalTraining/Crash Course/Mock Exams for both local (eg. H2, Singapore-Cambridge) and international exams (CIE, Pearson Edexcel, IGCSE).
Why Choose Us?
Our teachers are very experienced, and we actually TEACH you good practical techniques.
We have been a one-stop comprehensive science practical centre providing solid practical training for ALL THREE sciences and for all levels and streams since 2017.
Our laboratory apparatus are exam-grade and similar to those used in MOE schools and our chemicals are all NEA-approved.
We have a structured practical training programme catering to the needs of both beginners and experienced students.
We have a small class size so that the teacher is able to observe the actions of each student more closely and demonstrate the correct practical techniques where and when necessary.
Many private schools trust us to prepare and conduct science practical training and assessment for their students, including structured training, mock exams and even actual CIE science practical exams.
Give the one or two factors inherent to the procedure, not a general list.
Every answer has three parts: (i) the specific step and the physical or chemical reason the recorded quantity deviates from the true value; (ii) the quantity affected, stated as too high, too low, or inconsistent; (iii) a concrete precaution.
State the effect on the quantity actually recorded — a mass, a volume, a temperature, a time — not on the underlying chemistry itself. “The reaction is faster” is not an answer; “the time recorded is shorter than expected” is.
Rejected as “too general” unless further justified for the exact procedure:
Parallax error, without stating which scale and why it cannot be avoided here.
“Human error” or “random error”, without a stated cause.
Zero error — correctable by taring or calibration, not a genuine source of error.
“Apparatus not accurate enough”, without naming the reading it limits.
Anything solved by “being more careful” or “repeating the reading” — repetition addresses random error only, and most examined sources here are systematic.
1.1 Random and Systematic Error
Source of Error
Effect on the Reading / Result
Precaution / Improvement
Random error
Scatter in either direction from the limit of instrument resolution or from inexact repetition — e.g. titre volumes of 24.50, 24.15, 24.40 cm³ for repeats of the same titration.
Repeat until two titres agree within 0.10 cm³ (concordant results) and average these; take repeated mass or temperature readings where practicable.
Systematic error
A constant bias in one direction throughout the experiment, from a fault in method or apparatus — e.g. heat loss to the surroundings in every run, or an indicator that changes colour before the true end-point.
Not reduced by repetition. Identify the fault and correct the method (insulate, change indicator, use a control) or apply a calculated correction (e.g. a cooling correction).
1.2 Precision of Common Apparatus
Apparatus
Precision (Uncertainty)
How to Read / Use Correctly
Burette
± 0.05 cm³ (read to 2 d.p.)
Read the bottom of the meniscus at eye level for colourless solutions; for deeply coloured solutions (e.g. potassium manganate(VII)), read the top of the meniscus instead.
Pipette (25.0 cm³ / 20.0 cm³)
Fixed volume, delivered “to deliver”
Allow to drain fully; touch the tip against the vessel wall; do not blow out the last drop unless the pipette is marked to do so.
Measuring cylinder
± 0.5 cm³ (10–100 cm³ sizes)
Read at eye level to the bottom of the meniscus; select the smallest cylinder that holds the required volume.
Thermometer (liquid-in-glass)
± 0.5 °C
Read at eye level; keep the bulb fully immersed and clear of the container wall; allow time to reach a steady reading.
Digital stopwatch
± 0.01 s (device); human reaction time ≈ 0.2–0.3 s dominates
Start and stop at a clearly defined visual or colour-change cue; where the cue is subjective, use the same observer for all repeats.
Electronic (top-pan) balance
± 0.01 g
Tare before every measurement; close balance doors/draught shields if fitted; avoid draughts from open windows or fans.
Gas syringe
± 0.5 cm³, with plunger friction as an added source of lag
Check the plunger moves freely before use; keep the syringe horizontal to avoid its own weight affecting the plunger.
2. Volumetric Analysis (Titration)
MₐVₐ / MᵦVᵦ = x / y, from the mole ratio xA + yB → C + D; used to find an unknown concentration.
Source of Error
Effect on the Reading / Result
Precaution / Improvement
Indicator chosen does not change colour sharply at the equivalence point of this acid–base pair (e.g. phenolphthalein used with a weak base–strong acid pair).
The volume of titrant recorded is too high or too low, giving a concentration that is too low or too high.
Choose an indicator whose colour-change range brackets the equivalence pH of this specific reaction; where the change is still not sharp, verify the end-point with a pH meter or data logger.
Too many drops of indicator added.
Excess indicator itself reacts with a small amount of titrant, so a larger volume of titrant is recorded than actually required by the analyte.
Add only 2–3 drops of indicator.
The titrant is a coloured solution (e.g. potassium manganate(VII)), so the meniscus is difficult to locate against the burette scale.
The initial or final burette reading is misjudged, giving an inaccurate titre.
Read the level at the top of the meniscus instead of the bottom, and take the reading against a white card held behind the burette.
An air bubble is trapped in the burette tip below the tap at the start of titration.
The bubble later escapes during titration and is counted as if it were titrant delivered, so the titre recorded is too high.
Run liquid through the tip before the initial reading to expel any air bubble, and check the tip is full before recording the initial volume.
The pipette, burette, or conical flask was rinsed with water only, and retains residual water that dilutes the solution added.
The concentration of the solution actually delivered is lower than intended, and calculated concentrations are inconsistent.
Rinse the pipette and burette with the solution they are about to hold (not water alone); the conical flask may be rinsed with water only, since the amount of analyte placed in it is unaffected by dilution.
The overshoot past the true end-point (one drop too many) is a fixed volume that is a larger fraction of a small titre than of a large one.
Percentage error in the titre is largest for reactions requiring a small volume of titrant.
Where possible, choose concentrations of analyte and titrant that require titre volumes in the region of 20–30 cm³, so a one-drop overshoot is a small percentage of the total.
The full set of notes, which includes sections such as Sources of Error by Practical Topic is available in hard copy for students who sign up for any of our regular practical lessons, Crash Courses or Mock Exams.
LOOKING FOR THE BEST PLACE TO DO YOUR SCIENCE PRACTICALS? JOIN US!
Singapore Learner has been a Comprehensive Science Practical Training provider since 2017.
As at 19 Apr 2026, we have trained about 1060 students for their science practical exams and we have conducted a total of about 4044 lab sessions.
Our laboratory apparatus are exam-grade and similar to those used in MOE schools and our chemicals are all NEA-approved.
We provide A-Level / H2 / IP and O-Level Physics, Chemistry, Biology and CombinedScience (Physics/Chemistry/Biology) PracticalTraining/Crash Course/Mock Exams for both local (eg. H2, Singapore-Cambridge) and international exams (CIE, Pearson Edexcel, IGCSE).
Why Choose Us?
Our teachers are very experienced, and we actually TEACH you good practical techniques.
We have been a one-stop comprehensive science practical centre providing solid practical training for ALL THREE sciences and for all levels and streams since 2017.
Our laboratory apparatus are exam-grade and similar to those used in MOE schools and our chemicals are all NEA-approved.
We have a structured practical training programme catering to the needs of both beginners and experienced students.
We have a small class size so that the teacher is able to observe the actions of each student more closely and demonstrate the correct practical techniques where and when necessary.
Many private schools trust us to prepare and conduct science practical training and assessment for their students, including structured training, mock exams and even actual CIE science practical exams.
measurements of length, time interval, temperature, volume, mass and weight, current and voltage using appropriate instruments (2025, 2022, 2021, 2015)
determination of the density of a liquid, or of a regularly or irregularly shaped solid which sinks in water (not tested in the last 10 years)
determination of the value of the acceleration of free fall (not tested in the last 10 years outside of pendulum experiments)
investigation of the effects of balanced and unbalanced forces (2022)
dynamics (2019, 2017)
extension of spring (2024, 2023p, 2020, 2018, 2016+p, 2014)
determination of the position of the centre of gravity of a plane lamina (not tested in the last 10 years)
mechanical energy and power (2020+p)
investigation of the factors affecting thermal energy transfer (not tested in the last 10 years)
determination of heat capacities of materials (2021)
latent heat of substances (not tested in the last 10 years)
the law of reflection (not tested in the last 10 years)
determination of the position and characteristics of an optical image formed by a plane mirror or a thin converging lens (not tested in the last 10 years)
the refraction of light through glass blocks (2021+p)
the principle of total internal reflection (not tested in the last 10 years)
the focal length of lenses (2023, 2016)
determination of the speed, wavelength and frequency of waves (not tested in the last 10 years)
DC circuits (2021, 2020, 2019 (LDR), 2017 (LED)+p, 2015)
potentiometer (2023, 2022, 2018, 2014)
determination of the resistance of a circuit element using appropriate instruments (2025)
investigation of the magnetic effect of current in a conductor (2024+p)
investigation of the effects of electromagnetic induction (not tested in the last 10 years)
So what topics are most likely to be tested THIS YEAR?
Sign up for our Revision Crash Course for O-Level Physics Practical, details of which can be found here: O-LEVEL PURE PHYSICS HANDS-ON PRACTICAL CRASH COURSE. Hurry, places are very limited as our lab can only take in 7 students max.
DO YOU KNOW THAT THE SCIENCE PRACTICAL IS WEIGHTED TO BETWEEN 15% TO 20% OF YOUR TOTAL SCIENCE EXAM MARKS?
It can actually make a 1 to 3 grade difference in your total points for your exam! And it is easier to score a Distinction for your Science exam if you are very competent in your Science Practicals.
Right now, ARE YOU CONFIDENT that you can complete your science practical exam and answer all its questions correctly in the time allocated?
If you are looking for SCIENCE PRACTICAL TRAINING, CRASH COURSE OR MOCK EXAM PRACTICE (FOR PHYSICS, CHEMISTRY, BIOLOGY), don’t hesitate to contact us at 65694897 or 88765498.
Singapore Learner has been a One-Stop Comprehensive Science Practical Training provider since 2017.
As at 19 Apr 2026, we have trained about 1060 students for their science practical exams and we have conducted a total of about 4044 lab sessions.
Our laboratory apparatus are exam-grade and similar to those used in MOE schools and our chemicals are all NEA-approved.
We provide A-Level / H2 / IP and O-Level Physics, Chemistry, Biology and CombinedScience (Physics/Chemistry/Biology) PracticalTraining/Crash Course/Mock Exams for both local (eg. H2, Singapore-Cambridge) and international exams (CIE, Pearson Edexcel, IGCSE).
Why Choose Us?
Our teachers are very experienced, and we actually TEACH you good practical techniques.
We have been a one-stop comprehensive science practical centre providing solid practical training for ALL THREE sciences and for all levels and streams since 2017.
Our laboratory apparatus are exam-grade and similar to those used in MOE schools and our chemicals are all NEA-approved.
We have a structured practical training programme catering to the needs of both beginners and experienced students.
We have a small class size so that the teacher is able to observe the actions of each student more closely and demonstrate the correct practical techniques where and when necessary.
Many private schools trust us to prepare and conduct science practical training and assessment for their students, including structured training, mock exams and even actual CIE science practical exams.
So what topics are most likely to be tested THIS YEAR?
Sign up for our Revision Crash Course for O-Level Biology Practical, details of which can be found here: O-LEVEL PURE BIOLOGY HANDS-ON PRACTICAL CRASH COURSE. Hurry, places are very limited as our lab can only take in 7 students max.
DO YOU KNOW THAT THE SCIENCE PRACTICAL IS WEIGHTED TO BETWEEN 15% TO 20% OF YOUR TOTAL SCIENCE EXAM MARKS?
It can actually make a 1 to 3 grade difference in your total points for your exam! And it is easier to score a Distinction for your Science exam if you are very competent in your Science Practicals.
Right now, ARE YOU CONFIDENT that you can complete your science practical exam and answer all its questions correctly in the time allocated?
If you are looking for SCIENCE PRACTICAL TRAINING, CRASH COURSE OR MOCK EXAM PRACTICE (FOR PHYSICS, CHEMISTRY, BIOLOGY), don’t hesitate to contact us at 65694897 or 88765498.
Singapore Learner has been a One-Stop Comprehensive Science Practical Training provider since 2017.
As at 19 Apr 2026, we have trained about 1060 students for their science practical exams and we have conducted a total of about 4044 lab sessions.
Our laboratory apparatus are exam-grade and similar to those used in MOE schools and our chemicals are all NEA-approved.
We provide A-Level / H2 / IP and O-Level Physics, Chemistry, Biology and CombinedScience (Physics/Chemistry/Biology) PracticalTraining/Crash Course/Mock Exams for both local (eg. H2, Singapore-Cambridge) and international exams (CIE, Pearson Edexcel, IGCSE).
Why Choose Us?
Our teachers are very experienced, and we actually TEACH you good practical techniques.
We have been a one-stop comprehensive science practical centre providing solid practical training for ALL THREE sciences and for all levels and streams since 2017.
Our laboratory apparatus are exam-grade and similar to those used in MOE schools and our chemicals are all NEA-approved.
We have a structured practical training programme catering to the needs of both beginners and experienced students.
We have a small class size so that the teacher is able to observe the actions of each student more closely and demonstrate the correct practical techniques where and when necessary.
Many private schools trust us to prepare and conduct science practical training and assessment for their students, including structured training, mock exams and even actual CIE science practical exams.
LOOKING FOR THE BEST PLACE TO DO YOUR SCIENCE PRACTICALS? JOIN US!
We provide A-Level / H2 and O-Level Physics, Chemistry, Biology and Science (Physics/Chemistry/Biology) PracticalTraining for private / school candidates and homeschoolers, for both local (eg. H2, Singapore-Cambridge) and international exams (CIE, IB, IGCSE).
For enquiries, contact 88765498 (Admin).
Missed the basic lab training? Join us on these dates, discuss other options or ask about how else we can meet your needs.
Titration is a laboratory method to determine the concentration or volume of an acid or alkali by reacting it with a solution of known concentration.
It is based on the idea of neutralisation:
Acid + Base → Salt + Water
Example:
H₂SO₄ + 2 NaOH → Na₂SO₄ + 2 H₂O
1. Key Definitions
Term
Meaning
Titration
Method to find an unknown concentration using neutralisation
Titre
Volume delivered from the burette
End-point
Point where indicator changes colour
Concordant results
Titres close to each other (usually within 0.10–0.20 cm³)
Standard solution
Solution with known concentration
Neutralisation
Acid reacts with alkali to form salt + water
SEAB commonly expects burette readings to the nearest 0.05 cm³ and concordant titres within about 0.20 cm³.
2. Apparatus and Their Functions
(a) Burette
Holds the solution added during titration
Usually 50.0 cm³
Used for variable volumes
Read to 2 decimal places
Precision: nearest 0.05 cm³
Important:
Scale goes from top to bottom
0 cm³ at the top
50 cm³ at the bottom
Common mistakes
❌ Reading from top incorrectly ❌ Not removing air bubbles ❌ Reading meniscus wrongly
(b) Pipette
Measures a fixed volume
Usually 25.0 cm³
More accurate than measuring cylinder
Important:
Use a pipette filler
Never suck by mouth
(c) Conical Flask
Contains solution being analysed
Easy to swirl without spilling
(d) White Tile
Helps observe colour change clearly
(e) Indicator
Substance that changes colour near end-point
Common indicators:
Methyl orange
Phenolphthalein
3. Indicator Colours
Methyl Orange
In Acid
Neutral
In Alkali
Red
Orange
Yellow
Typical colour change in titration
Alkali → acid added:
Yellow → orange
Phenolphthalein
In Acid
In Alkali
Colourless
Pink
Typical colour change
Alkali → acid added:
Pink → colourless
4. Choosing the Correct Indicator
For O-Level:
Strong acid + strong alkali:
Either methyl orange or phenolphthalein works
Examiner favourites
Methyl orange often used in school practicals
Phenolphthalein sometimes tested
Wide-range indicators are unsuitable because colour change is not sharp enough.
5. Step-by-Step Titration Procedure
Step 1 — Rinse apparatus
Burette
Rinse with distilled water
Then rinse with solution going inside
Pipette
Rinse with solution to be pipetted
Conical flask
Rinse with distilled water only
Step 2 — Fill burette
Use funnel
Remove funnel afterwards
Ensure no air bubbles
Record initial reading
Step 3 — Pipette solution
Pipette exactly 25.0 cm³
Transfer into conical flask
Step 4 — Add indicator
Add 2–3 drops only
Too much indicator causes error.
Step 5 — Perform rough titration
Add solution quickly while swirling
Stop when colour changes
Step 6 — Accurate titration
Near end-point:
Add solution drop by drop
Swirl continuously
Step 7 — Record final reading
Calculate:
Titre = Final burette reading – Initial burette reading
Step 8 — Repeat
Repeat until:
Two titres are concordant
Typical acceptable difference:
≤ 0.10 cm³
Sometimes ≤ 0.20 cm³ in practical guidance
6. How to Read the Burette Correctly
Read at eye level
To avoid:
Parallax error
Read bottom of meniscus
For colourless solutions:
Read lowest point of curve
Record to 2 decimal places
Correct:
24.50 cm³
18.05 cm³
Wrong:
24.5
18.053
7. Concordant Results
Meaning
Titres close together.
Example:
Trial
Titre/cm³
1
24.80
2
24.75
3
24.85
Trials 2 and 3 are concordant.
Average titre
Use only concordant values.
Example:
Average titre = 24.75 + 24.852
8. Titration Calculations
This is the MOST tested section.
Step-by-Step Calculation Method
Step 1 — Write balanced equation
Example:
H₂SO₄ + 2 NaOH → Na₂SO₄ + 2 H₂O
Step 2 — Convert volume to dm³
1 dm³ = 1000 cm³
Example:
25.0 cm³ = 0.0250 dm³
Step 3 — Use mole formula
n = cV
Where:
n = moles
c = concentration
V = volume in dm³
Step 4 — Use mole ratio
From balanced equation.
Example:
1 mol H₂SO₄ reacts with 2 mol NaOH
Step 5 — Find unknown concentration
Rearrange:
c = nv
9. Worked Example
Question
25.0 cm³ of sodium hydroxide reacted with 20.0 cm³ of 0.100 mol/dm³ sulfuric acid.
Find concentration of sodium hydroxide.
Step 1
Balanced equation:
H₂SO₄ + 2 NaOH → Na₂SO₄ + 2 H₂O
Step 2
Moles of sulfuric acid:
n = cV = 0.100 x 0.0200
= 0.00200 mol
Step 3
Use ratio:
1:2
NaOH moles:
= 0.00400 mol
Step 4
Volume of NaOH:
25.0 cm³ = 0.0250 dm³
Step 5
Concentration:
c =0.004000.0250
= 0.160 mol/dm³
10. Sources of Error
Error
Effect
Overshooting end-point
Titre too large
Air bubble in burette
Wrong titre
Parallax error
Wrong reading
Not rinsing apparatus properly
Dilution error
Adding too much indicator
Affects result
11. Improvements
Problem
Improvement
Difficult to see colour
Use white tile
Overshooting
Add dropwise near end-point
Human judgement error
Repeat titrations
Parallax
Read at eye level
12. Practical Exam Tips
Before starting
✔ Check burette for air bubbles ✔ Remove funnel ✔ Record initial reading properly
During titration
✔ Swirl continuously ✔ Wash flask walls with distilled water ✔ Slow down near end-point
Near end-point
✔ Add one drop at a time ✔ Watch carefully for permanent colour change
13. Colour Change Tips
Methyl orange
Yellow → orange = end-point
Red means overshot
Phenolphthalein
Pink → colourless = end-point
14. Common Exam Questions
Describe how to carry out a titration
Must mention:
Pipette 25.0 cm³ into flask
Add indicator
Fill burette
Record readings
Add solution slowly with swirling
End-point colour change
Repeat for concordant results
Why use conical flask?
Allows swirling without spilling.
Why use pipette instead of measuring cylinder?
More accurate.
Why remove funnel?
Drops may enter burette and change reading.
Why wash flask sides with distilled water?
Ensures all reactants react.
15. Must-Memorise Values
Item
Value
Pipette reading
1 d.p.
Burette reading
2 d.p.
Burette precision
0.05 cm³
Concordant titres
within 0.10–0.20 cm³
Pipette common volume
25.0 cm³
Burette common volume
50.0 cm³
16. Ultimate Exam Checklist
Before practical ends:
✅ Initial and final readings recorded ✅ 2 decimal places used ✅ Concordant results obtained ✅ Average titre calculated correctly ✅ Units included ✅ Balanced equation written ✅ Mole ratio used correctly ✅ Volume converted to dm³
17. High-Yield Mistakes Students Make
❌ Forgetting to convert cm³ to dm³ ❌ Using wrong mole ratio ❌ Reading top of meniscus ❌ Overshooting endpoint ❌ Averaging rough titre with accurate titres ❌ Forgetting units ❌ Recording burette reading with 1 d.p.
LOOKING FOR THE BEST PLACE TO DO YOUR SCIENCE PRACTICALS? JOIN US!
Singapore Learner has been a Comprehensive Science Practical Training provider since 2017.
As at 19 Apr 2026, we have trained about 1060 students for their science practical exams and we have conducted a total of about 4044 lab sessions.
Our laboratory apparatus are exam-grade and similar to those used in MOE schools and our chemicals are all NEA-approved.
We provide A-Level / H2 / IP and O-Level Physics, Chemistry, Biology and CombinedScience (Physics/Chemistry/Biology) PracticalTraining/Crash Course/Mock Exams for both local (eg. H2, Singapore-Cambridge) and international exams (CIE, Pearson Edexcel, IGCSE).
Why Choose Us?
Our teachers are very experienced, and we actually TEACH you good practical techniques.
We have been a one-stop comprehensive science practical centre providing solid practical training for ALL THREE sciences and for all levels and streams since 2017.
Our laboratory apparatus are exam-grade and similar to those used in MOE schools and our chemicals are all NEA-approved.
We have a structured practical training programme catering to the needs of both beginners and experienced students.
We have a small class size so that the teacher is able to observe the actions of each student more closely and demonstrate the correct practical techniques where and when necessary.
Many private schools trust us to prepare and conduct science practical training and assessment for their students, including structured training, mock exams and even actual CIE science practical exams.
In chemistry, qualitative analysis refers to the process of identifying what substances are present in an unknown sample. The emphasis is on the properties and reactions observed, rather than numeric measurements.
During qualitative analysis, you focus on:
the appearance of a substance;
colour changes or changes in physical state, such as the formation of a precipitate (solid) or the evolution of a gas; and
the interaction of the substance with test reagents such as litmus paper.
This differs from quantitative or volumetric analysis, which involves taking measurements to determine the amount or concentration of a substance.
You should be familiar with the standard chemical tests for the following ions and gases:
No practical tests involving sulfur dioxide are required.
A positive acidity test indicates the presence of H⁺ ions, whereas a positive alkalinity test shows the presence of OH⁻ ions.
General Guidelines for QA
Experimental Techniques and Skills
1. Apparatus
Use test‑tubes or boiling tubes to perform most tests. Boiling tubes are slightly larger and more heat‑resistant than standard test‑tubes.
Check that all glassware is clean, dry, and free from cracks before use.
For accurate colour observation, hold the test‑tube against a white tile or sheet of white paper for contrast.
2. Samples
Use a spatula for solids and a dropper for small liquid volumes.
Unless otherwise instructed, use:
not more than 1 cm depth of solid, or
not more than 2 cm depth of solution in a test‑tube.
Using excess samples can obscure reactions or cause safety hazards.
3. Technique
Work carefully and deliberately.
Unless stated otherwise, add reagents drop by drop.
Prepare all materials beforehand so you can focus on one test at a time.
When heating:
Hold the test‑tube with tongs or a holder.
Begin with gentle heating before increasing intensity.
Always point the mouth of the test‑tubeaway from yourself and others.
If the reaction becomes vigorous, remove it from the flame immediately.
Making and Recording Observations
After each test:
Record your observations immediately while they’re fresh.
Draw inferences and conclusions clearly and accurately.
Summarise these in your practical notes or report.
When recording data:
Include ALL noticeable observations — colour changes, precipitates formed, and gases evolved.
Use clear, specific terminology so that another person could replicate or understand your results easily.
1. Describing Colours
Always describe every colour change that takes place.
Use simple, accurate colour descriptions such as “blue,” “green,” “yellow,” “orange,” “brown,” “white,” or “black.”
If mixed colours appear and no exact shade can be determined, use compound terms such as red‑brown, blue‑green, or yellow‑green.
Avoid imprecise or hybrid colour phrases like red‑yellow (when “orange” is more accurate).
The words light or dark may be used for shades.
If a gas or liquid is clear and has no colour, describe it as colourless, not white.
2. States of Matter and Their Descriptions
(a) Solids
Describe solids as crystalline, powdery, or metallic in appearance.
When two solutions form an insoluble solid, that solid is called a precipitate.
A solid forming on another surface is a deposit, and one remaining after heating or filtration is a residue.
(b) Liquids
A solution is a uniform mixture of solute and solvent.
A cloudy or turbid liquid indicates a suspension — tiny particles are dispersed but not dissolved.
(c) Gases
Observe whether gases have distinctive smells but never inhale directly — waft gently toward your nose instead.
A solid that forms when a gas cools is called a sublimate or deposit.
(d) Changes Upon Heating
A solid may convert into another solid (residue) of different appearance.
Some solids decompose completely and leave no solid.
A few solids sublime, turning directly into gas.
When bubbles form in a liquid as a gas evolves, describe the observation as “effervescence is observed” instead of simply “a gas is produced.”
Procedures and Observations for Tests
Test for Aqueous Cations
Cations are typically identified using aqueous sodium hydroxide (NaOH) and aqueous ammonia (NH₄OH).
Procedure:
Place about 2 cm of the unknown solution into a test‑tube.
Tilt the tube slightly and add the reagent slowly down the side.
Observe any colour change or precipitate.
Return the tube upright and swirl gently.
Continue adding reagent in excess until no further change occurs.
Observation Checklist:
Whether a precipitate forms
Colour of the precipitate
Whether it is soluble in excess reagent
If ammonia gas is released when using NaOH
Summary Table: Tests and Observations for Common Cations
Cation
Aqueous Sodium hydroxide, NaOH(aq)
Aqueous Ammonia, NH₃(aq)
Adding a few drops
Adding excess
Adding a few drops
Adding excess
Aluminium ion (Al³⁺)
White ppt of Al(OH)₃
Dissolves to a colourless solution
White ppt
Insoluble
Zinc ion (Zn²⁺)
White ppt of Zn(OH)₂
Dissolves to colourless solution
White ppt
Dissolves to colourless solution
Calcium ion (Ca²⁺)
White ppt of Ca(OH)₂
Insoluble
No ppt
No change
Ammonium ion (NH₄⁺)
No ppt. On warming, NH₃ gas released; turns litmus blue.
No change
Copper(II) ion (Cu²⁺)
Light blue ppt of Cu(OH)₂
Insoluble
Light blue ppt
Dissolves in excess to dark blue solution
Iron(II) ion (Fe²⁺)
Green ppt of Fe(OH)₂
Insoluble; turns brown on standing
Green ppt
Insoluble; turns brown on standing
Iron(III) ion (Fe³⁺)
Red‑brown ppt of Fe(OH)₃
Insoluble
Red‑brown ppt
Insoluble
Note: Iron(II) hydroxide quickly oxidises in air to form brown iron(III) hydroxide.
If no precipitate appears with NaOH and no ammonia is evolved, the cation is likely a Group I metal (e.g. Na⁺, K⁺).
Test for Aqueous Anions
Anions are tested systematically using dilute nitric acid (HNO₃) first to eliminate interfering ions. When testing for nitrate, you must use another reagent because nitric acid itself contains nitrate ions.
Phase 1 : Test for Carbonate (CO₃²⁻) Add about 2 cm of the unknown sample to a test‑tube. Place a drop on red litmus paper. If the paper turns blue, add a few drops of dilute nitric acid. If effervescence occurs, confirm with the limewater test. A white ppt that dissolves on further bubbling proves the presence of carbonate ions (CO₃²⁻). If no gas forms, the sample is an alkali (contains OH⁻). If litmus stays red, move to the next phase.
Phase 2 : Test for Chloride (Cl⁻) or Iodide (Pure Chem) Acidify the solution from Phase 1 with nitric acid. Add aqueous silver nitrate down the side of the tube. Observation of a white precipitate confirms chloride ions. (Pure Chem: if a yellow ppt. is observed, then iodide ions confirmed) If no ppt forms, proceed to Phase 3.
Phase 3 : Test for Sulfate (SO₄²⁻) Add aqueous barium nitrate (Ba(NO₃)₂) to the previous acidified mixture. Formation of a white precipitate confirms sulfate ions (SO₄²⁻). If no ppt forms, proceed to Phase 4.
Phase 4 : Test for Nitrate (NO₃⁻) Place fresh solution (no nitric acid added) in a clean tube. Add aqueous sodium hydroxide and a small piece of aluminium foil. Warm gently. Test the gas with damp red litmus paper – if it turns blue, ammonia gas is produced, confirming nitrate ions.
Summary Table: Tests and Observations for Common Anions
Anion
Test
Observation
Carbonate ion (CO₃²⁻)
1. Test the solution with red litmus paper.
Red litmus paper turns blue.
2. Add dilute nitric acid.
Effervescence is observed.
3. Test for CO2by bubbling the gas through limewater.
The gas produced, CO2, forms a white precipitate of calcium carbonate in limewater that dissolves after more bubbling.
Chloride ion (Cl⁻)
Add dilute nitric acid, then aqueous silver nitrate.
Formation of a white precipitate of silver chloride (AgCl).
Sulfate ion (SO₄²⁻)
Add dilute nitric acid, then aqueous barium nitrate.
Formation of a white precipitate of barium sulfate (BaSO₄).
Nitrate (NO₃⁻)
1. Add NaOH and aluminium foil, then warm.
Effervescence is observed.
2. Test for ammonia gas with damp red litmus paper.
The gas produced, ammonia gas, turns damp red litmus paper blue.
Notes:
Always eliminate hydroxide and carbonate ions first using litmus and acid tests.
Test for nitrate only when other ions have been ruled out.
Test for Gases These procedures help you identify gases by their effects and reactions.
Phase 1: Determine Acidic, Basic, or Neutral Gas Hold damp red and blue litmus papers near the gas source. Red → Blue → Gas is ammonia (NH₃). Blue → Red → Could be CO₂, SO₂, or Cl₂ (proceed to Phase 2). Blue → Red then bleached → Chlorine (Cl₂) or Sulfur dioxide (SO₂). No change → Gas is neutral (H₂ or O₂). ⚠️ A yellow‑green gas indicates concentrated chlorine – a severe inhalation hazard.
Phase 2 : Testing Acidic Gases If blue litmus turns red (not bleached): bubble gas through limewater. A white precipitate dissolving in excess gas → Carbon dioxide. If blue litmus turns red and bleaches: hold acidified potassium manganate(VII) paper at tube mouth. Paper turns from purple to colourless → Sulfur dioxide. Paper stays purple → Chlorine. (Chlorine can also turn potassium iodide‑starch paper blue, but this confirmatory test is usually unnecessary.)
Phase 3 : Testing Neutral Gases Add a metal and apply a burning splint: “pop” sound → Hydrogen. Without metal, insert a glowing splint: relights → Oxygen.
Summary Table: Tests and Observations for Gases
Gas
Effect on Litmus
Further Test and Observation
Ammonia (NH₃)
Turns damp red litmus paper blue.
Carbon dioxide (CO₂)
Turns damp blue litmus paper red.
Formation of white precipitate when bubbled through limewater. With further bubbling, the white precipitate dissolves in limewater.
Chlorine (Cl₂)
Turns damp blue litmus paper red, then bleaches it.
Turns potassium iodide (KI) solution from colourless to brown Or Turns potassium iodide (KI) starch paper to purple or dark blue* *This is a positive test for an oxidising agent, Cl₂.
Hydrogen (H₂)
No observed change
A burning splint is extinguished with a “pop” sound.
Oxygen (O₂)
No observed change
A glowing splint is relighted.
Sulfur dioxide (SO₂)
Turns damp blue litmus paper red.
Turns acidified potassium manganate(VII) (KMnO₄) from purple to colourless** **This is a positive test for a reducing agent, SO₂.
⚠️ Some gases, like chlorine and sulfur dioxide, have pungent, irritating odours and can be poisonous. Always waft carefully, and do not inhale directly.
LOOKING FOR THE BEST PLACE TO DO YOUR SCIENCE PRACTICALS? JOIN US!
Singapore Learner has been a Comprehensive Science Practical Training provider since 2017.
As at 19 Apr 2026, we have trained about 1060 students for their science practical exams and we have conducted a total of about 4044 lab sessions.
Our laboratory apparatus are exam-grade and similar to those used in MOE schools and our chemicals are all NEA-approved.
We provide A-Level / H2 / IP and O-Level Physics, Chemistry, Biology and CombinedScience (Physics/Chemistry/Biology) PracticalTraining/Crash Course/Mock Exams for both local (eg. H2, Singapore-Cambridge) and international exams (CIE, Pearson Edexcel, IGCSE).
Why Choose Us?
Our teachers are very experienced, and we actually TEACH you good practical techniques.
We have been a one-stop comprehensive science practical centre providing solid practical training for ALL THREE sciences and for all levels and streams since 2017.
Our laboratory apparatus are exam-grade and similar to those used in MOE schools and our chemicals are all NEA-approved.
We have a structured practical training programme catering to the needs of both beginners and experienced students.
We have a small class size so that the teacher is able to observe the actions of each student more closely and demonstrate the correct practical techniques where and when necessary.
Many private schools trust us to prepare and conduct science practical training and assessment for their students, including structured training, mock exams and even actual CIE science practical exams.