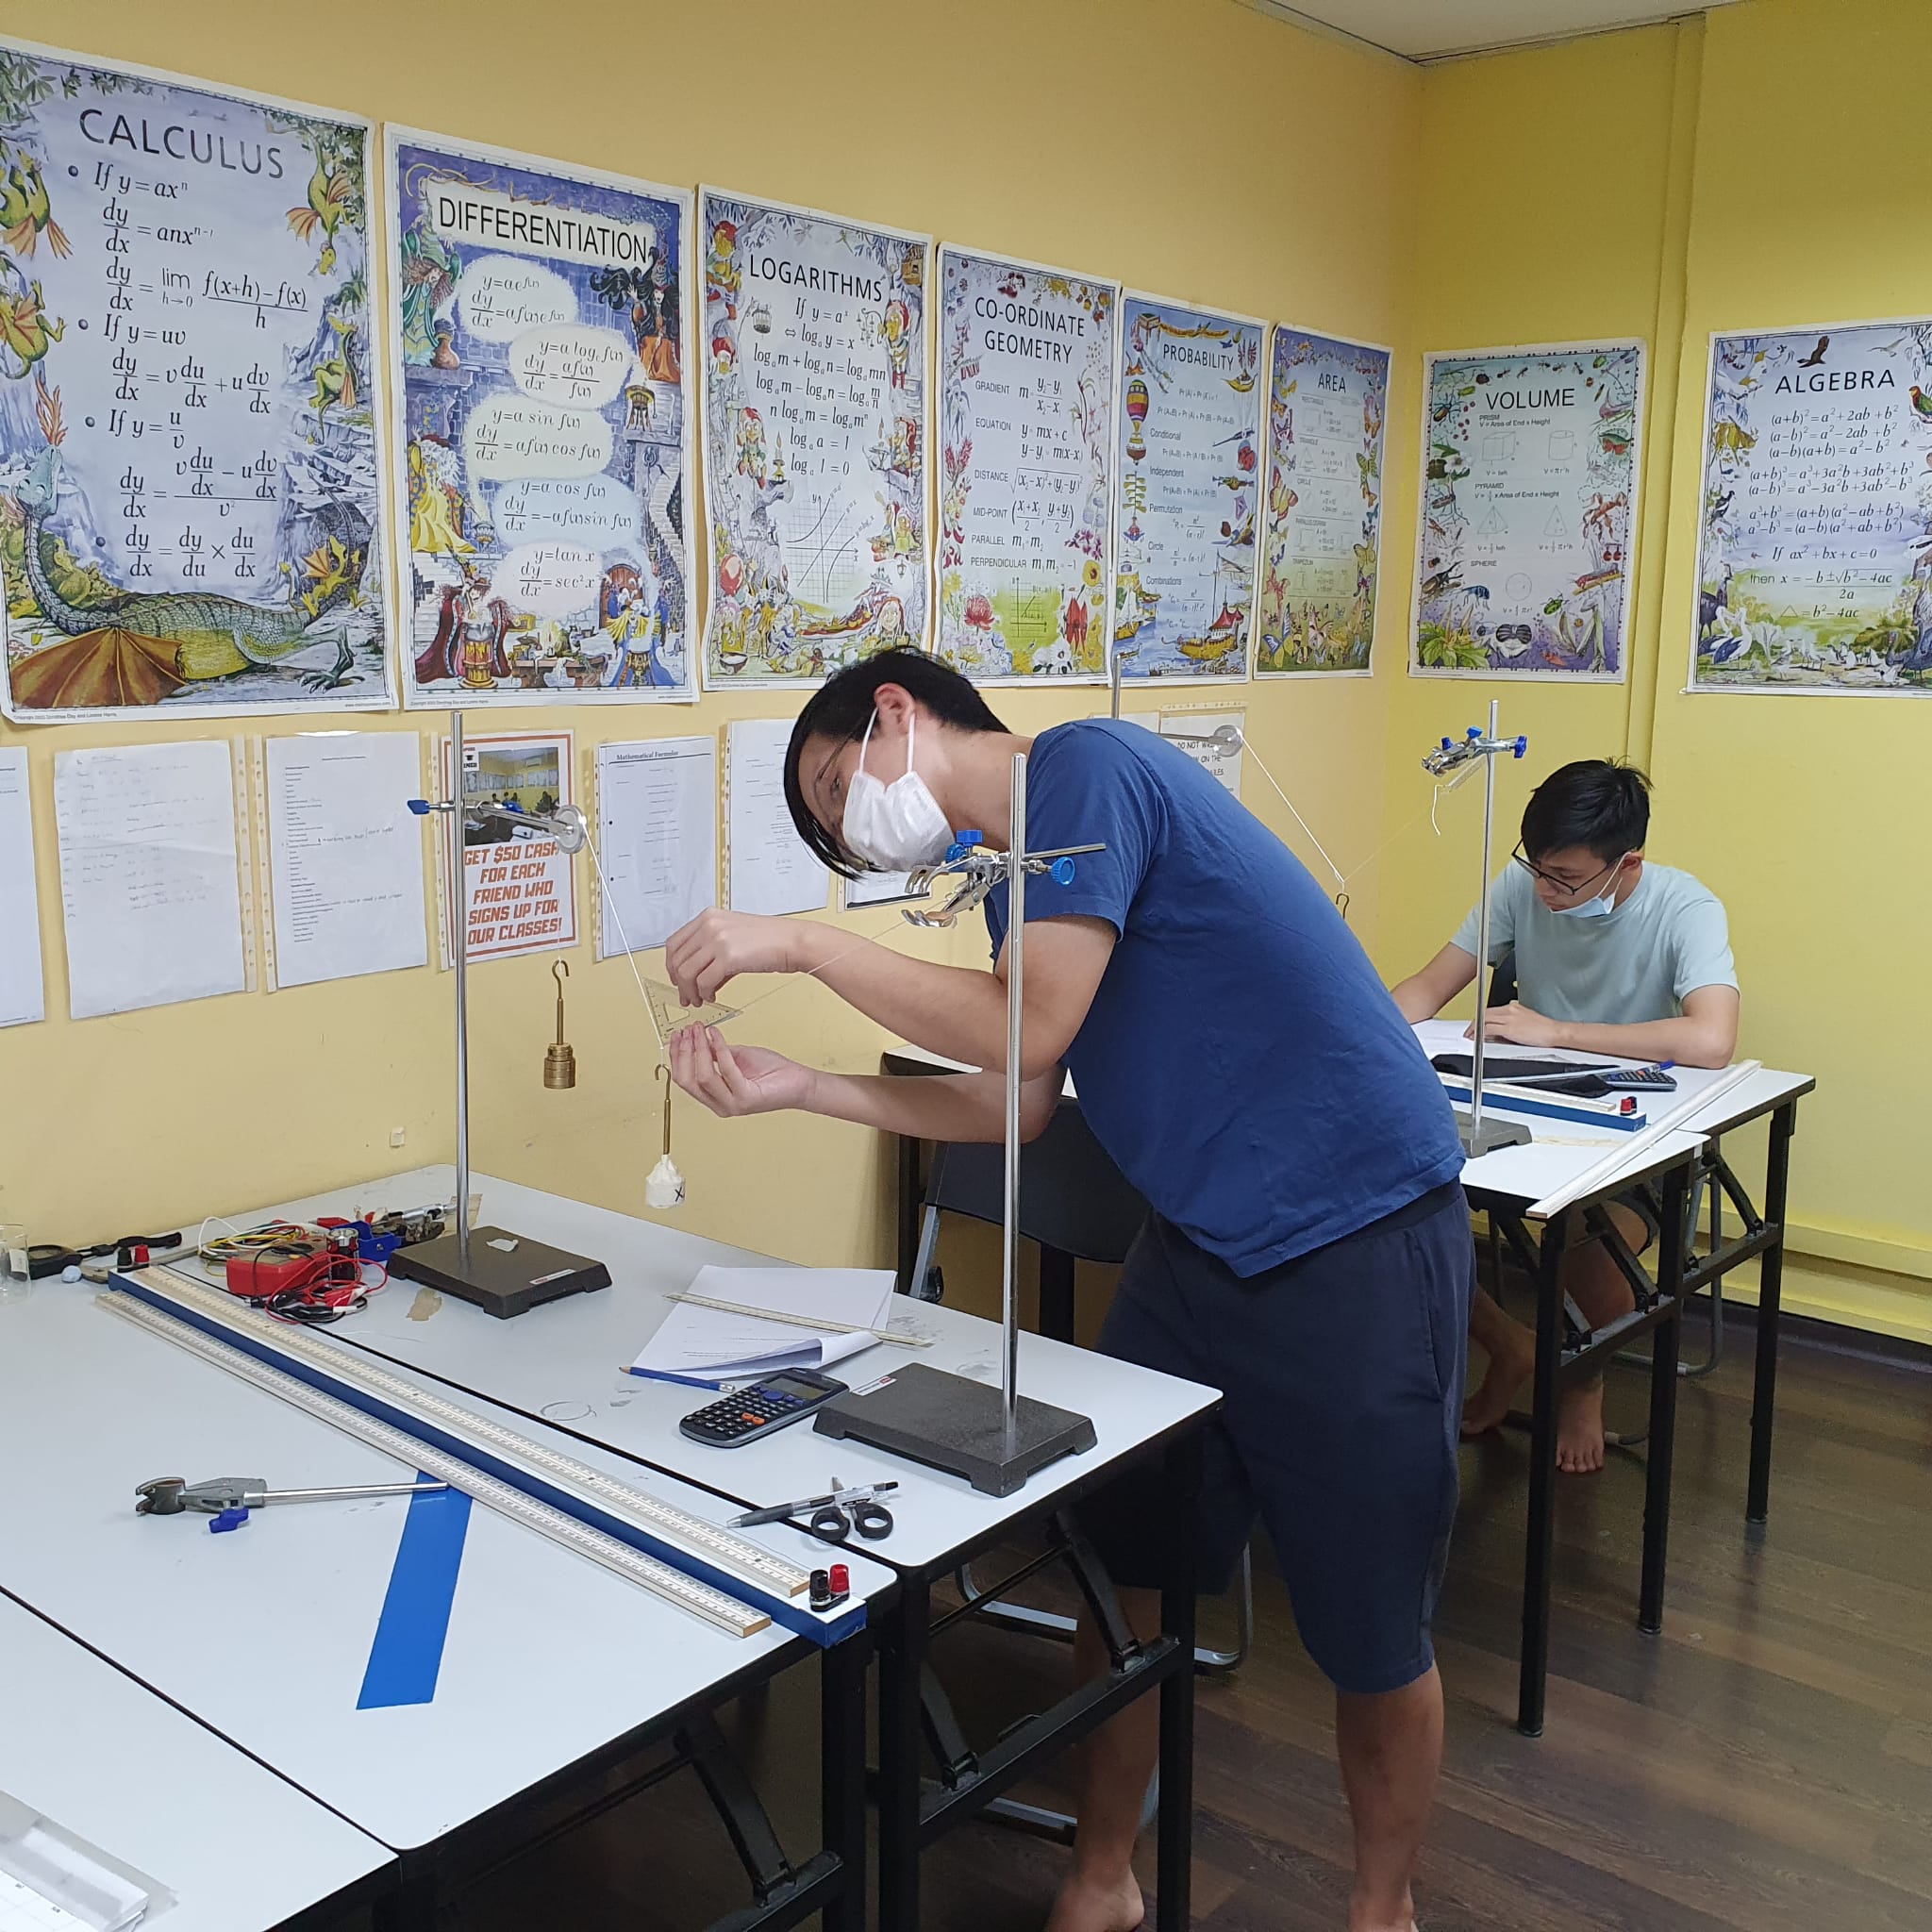
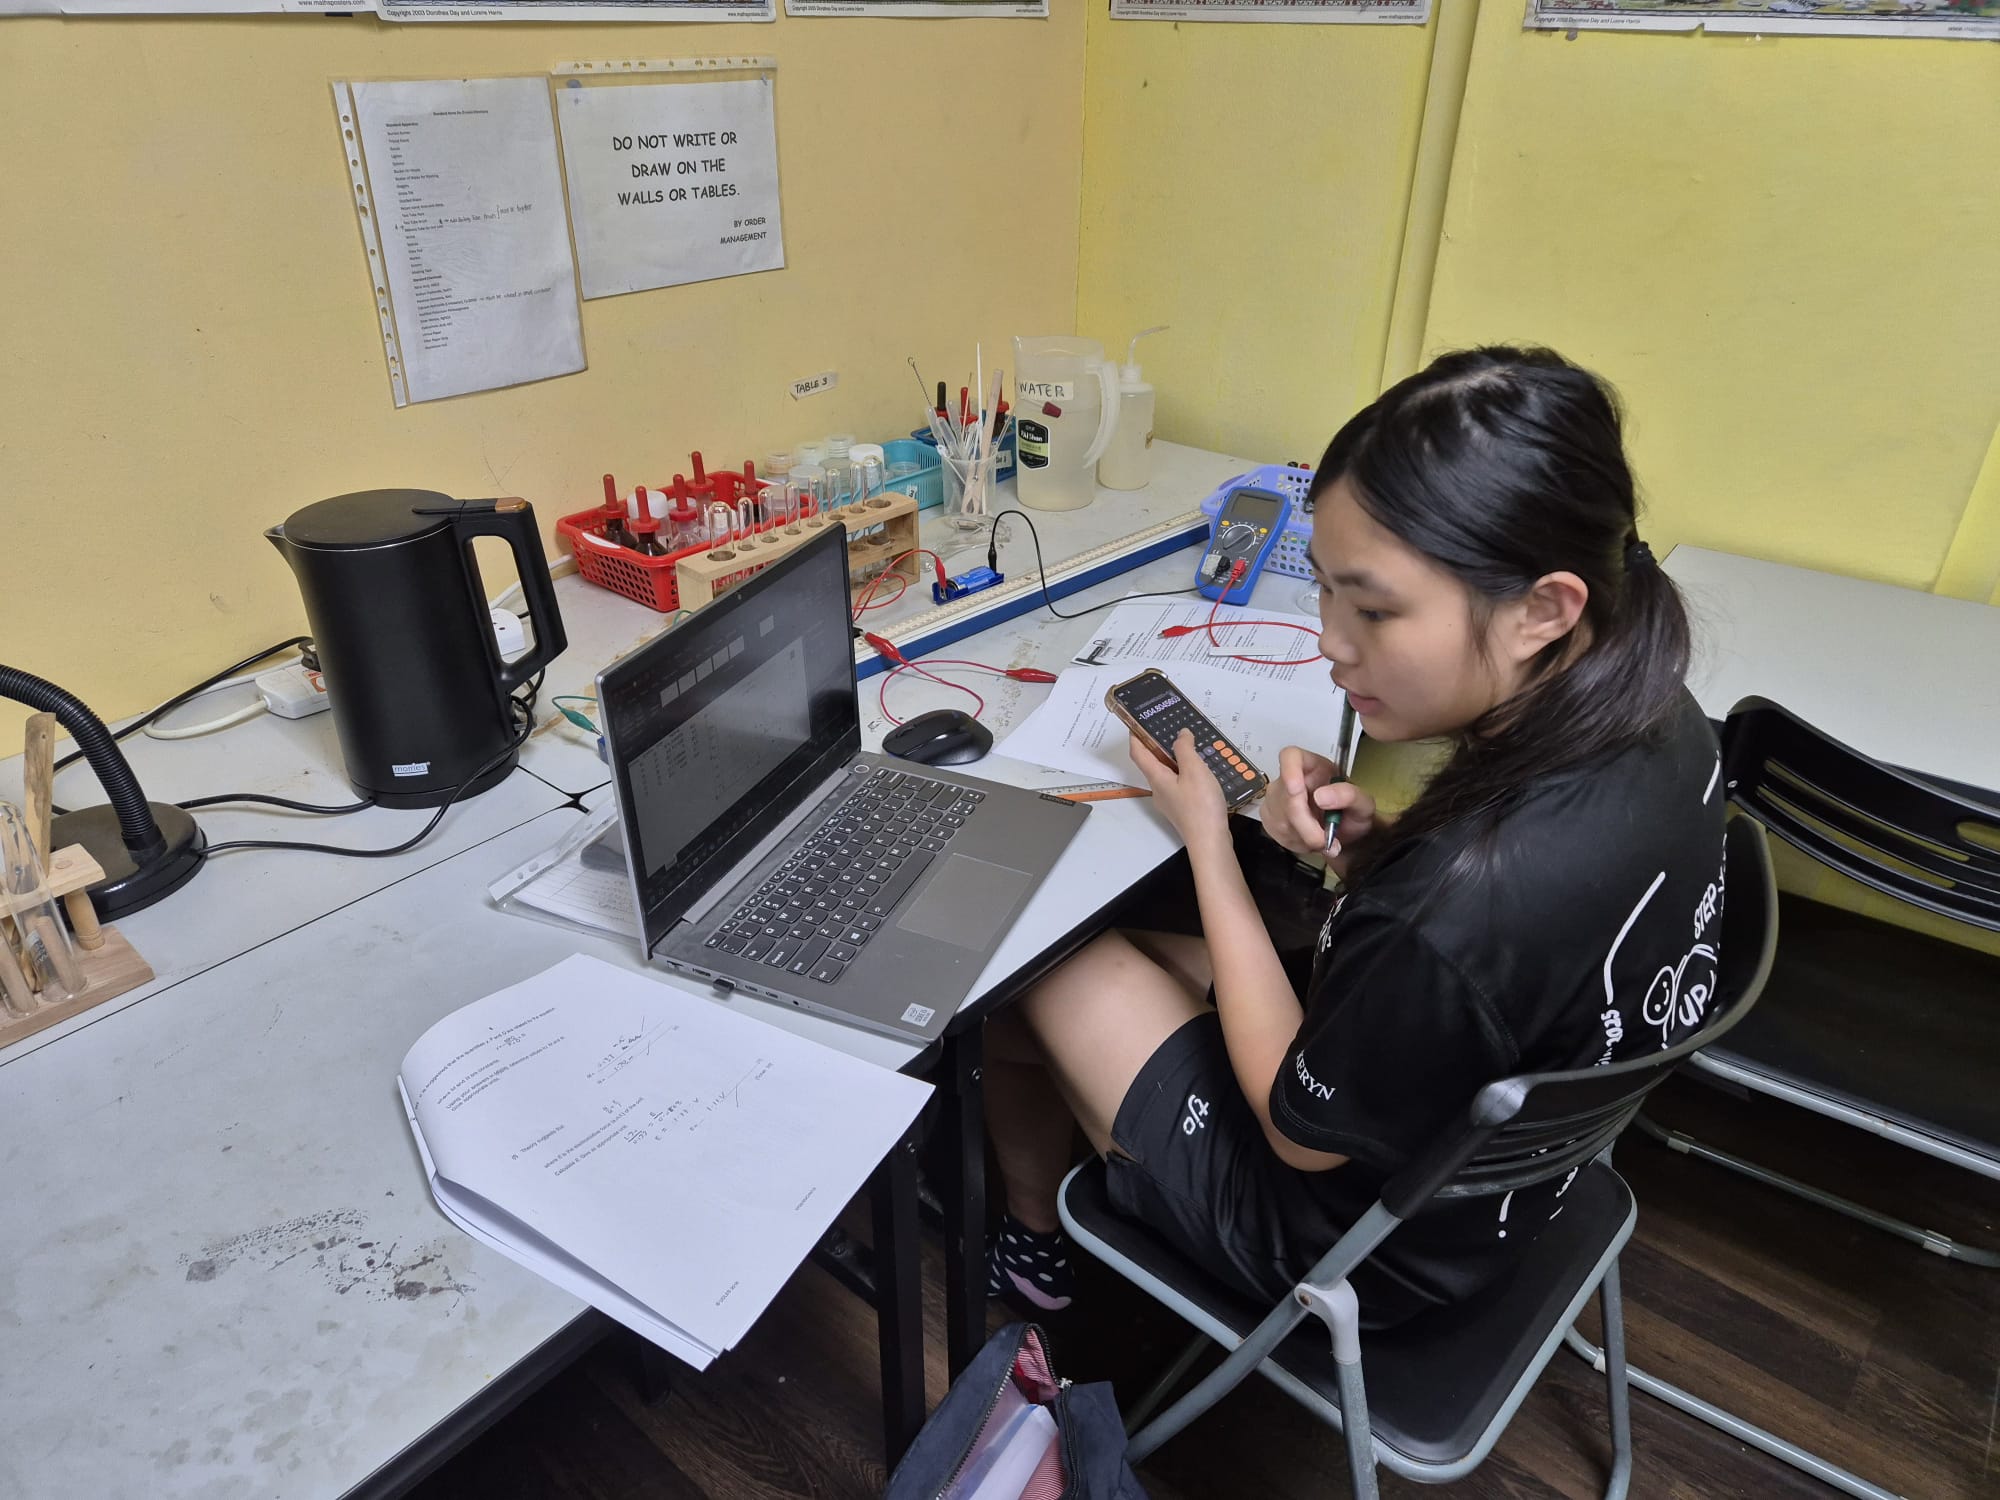
If you are interested in gaining work experience in any or some of these areas – educational materials, teaching (science practicals), science lab preparation and upkeeping, administration or marketing, you may apply to be a paid intern in our company.
We are open for internship from March to October.
For enquiries, please send an email to singaporelearner@gmail.com.
So what topics are most likely to be tested THIS YEAR?
To find out, sign up for our Predictive Revision Crash Course for O-Level Biology Practical, details of which can be found here: O-LEVEL PURE BIOLOGY HANDS-ON PRACTICAL CRASH COURSE. Hurry, places are very limited as our lab can only take in 7 students max.
DO YOU KNOW THAT THE SCIENCE PRACTICAL IS WEIGHTED TO BETWEEN 15% TO 20% OF YOUR TOTAL SCIENCE EXAM MARKS?
It can actually make a 1 to 3 grade difference in your total points for your exam! And it is easier to score a Distinction for your Science exam if you are very competent in your Science Practicals.
Right now, ARE YOU CONFIDENT that you can complete your science practical exam and answer all its questions correctly in the time allocated?
If you are looking for SCIENCE PRACTICAL TRAINING, CRASH COURSE OR MOCK EXAM PRACTICE (FOR PHYSICS, CHEMISTRY, BIOLOGY), don’t hesitate to contact us at 65694897 or 88765498.
Singapore Learner has been a One-Stop Comprehensive Science Practical Training provider since 2017.
As at 19 Apr 2026, we have trained about 1060 students for their science practical exams and we have conducted a total of about 4044 lab sessions.
Our laboratory apparatus are exam-grade and similar to those used in MOE schools and our chemicals are all NEA-approved.
Dilution of stock solutions through both simple dilution and serial dilution (2025, 2022, 2019).
Microscopy which involves the proper use of the microscope for viewing specimen, calibration of eyepiece graticule (2022), using a stage micrometer, calculation of area of field of view, calculating mean density of specimen, finding the actual width of a specimen, making your own slide (2022-plasmolysis, 2019-banana, 2018-potato).
Producing biological drawings at low-power and high-power as well as calculating the drawing magnification. (2025-stem of willow tree, 2023-plant stem, 2022-leaf of tea plant, plasmolysis, 2021-plant stem, 2020-leaf, 2019-banana, 2018-leaf, 2017-plant stem, 2016-blood cells)
Identify significant sources of error, limitations of measurements and/or experimental procedures used and explain how they affect the final result(s). (most years)
State and explain how significant sources of errors/limitations may be overcome/reduced, as appropriate, including how experimental procedures may be improved. (most years)
Graph-drawing e.g. best-fit line, best-fit curve, point-to-point graphs, bar graphs and histograms. (most years)
Factors affecting rate of transport of substances e.g. diffusion and osmosis. (2021, 2019-visking tubing)
Presence of biological molecules (food tests) e.g. test for reducing sugars (using suitable indicators such as benedict’s solution), test for non-reducing sugars (using acid hydrolysis), test for proteins (using suitable indicators such as biuret solution), test for lipids (using ethanol-emulsion test) and test for starch (using suitable indicators such as iodine). (2025, 2024, 2021, 2019)
Factors affecting rate of respiration. (2025-planning, 2024-planning, 2018)
Factors affecting the rate of photosynthesis. (not tested in the last 10 years)
Statistical analysis. (2023-t-test, 2020-t-test)
Growth rate of plants. (2023-planning)
Genetics and Inheritance. (2021-planning)
So what topics are most likely to be tested THIS YEAR?
To find out, sign up for our Predictive Revision Crash Course for H2 Biology Practical, details of which can be found here: H2 BIOLOGY HANDS-ON PRACTICAL CRASH COURSE. Hurry, places are very limited as our lab can only take in 7 students max.
DO YOU KNOW THAT THE SCIENCE PRACTICAL IS WEIGHTED TO BETWEEN 15% TO 20% OF YOUR TOTAL SCIENCE EXAM MARKS?
It can actually make a 1 to 3 grade difference in your total points for your exam! And it is easier to score a Distinction for your Science exam if you are very competent in your Science Practicals.
Right now, ARE YOU CONFIDENT that you can complete your science practical exam and answer all its questions correctly in the time allocated?
If you are looking for SCIENCE PRACTICAL TRAINING, CRASH COURSE OR MOCK EXAM PRACTICE (FOR PHYSICS, CHEMISTRY, BIOLOGY), don’t hesitate to contact us at 65694897 or 88765498.
Singapore Learner has been a One-Stop Comprehensive Science Practical Training provider since 2017.
As at 19 Apr 2026, we have trained about 1060 students for their science practical exams and we have conducted a total of about 4044 lab sessions.
Our laboratory apparatus are exam-grade and similar to those used in MOE schools and our chemicals are all NEA-approved.
LOOKING FOR THE BEST PLACE TO DO YOUR SCIENCE PRACTICALS? JOIN US!
We provide A-Level / H2 and O-Level Physics, Chemistry, Biology and Science (Physics/Chemistry/Biology) PracticalTraining for private / school candidates and homeschoolers, for both local (eg. H2, Singapore-Cambridge) and international exams (CIE, IB, IGCSE).
For enquiries, contact 88765498 (Admin).
Missed the basic lab training? Join us on these dates, discuss other options or ask about how else we can meet your needs.
Decide which examination system (Singapore-Cambridge, CIE etc.) you wish to train students for.
Decide which level(s) (A or O) and which subjects (Biology, Chemistry etc.) for your practical programme.
Read thoroughly the science practical syllabus for each level and subject. Take note of the Assessment Objectives, Exam Paper format and the list of apparatus and chemicals needed for each level and subject.
Choose a suitable location, building and unit for your science lab. Please note that for Biology and Chemistry, your lab must have windows which can be opened for ventilation purposes.
Install fire safety systems and devices in your lab, as well as subject-specific safety equipment such as chemical shower facility for chemistry.
Create all the worksheets (at least 10), prep lists and suggested answers for subject and level.
Purchase and store all the apparatus and chemicals you will need.
Equip your lab with the right furniture and standard bench reagents and devices such as retort stands and portable burners.
Hire Lab Assistants to help you manage the lab.
Hire teachers or tutors who are comfortable with conducting lab sessions.
PREPARING A SCIENCE EXPERIMENT
About two weeks before the date of the expt, scrutinize its prep list and check for items which you may need to purchase immediately, as suppliers may take a week to send them.
Lab Asst to prepare all the apparatus and chemicals according to specifications, such as quantity, mass or concentration of a substance, including spare apparatus and chemicals. Every bottle has to be labelled.
Lab Asst to layout all the items and chemicals for each student.
Lab Asst to ensure that all the bench reagents and consumables have been topped up.
All the lab worksheets, notes and answers must be printed.
At the end of the experiment, all the used test-tubes, bottles, beakers etc. have to be washed and dried, and other apparatus have to be stored.
SUSTAINING A SCIENCE PRACTICAL TRAINING PROGRAMME
Weekly schedules have to be updated to cater to various student groups, subjects and levels.
Lab rooms have to be assigned to different groups or experiments for laying out of apparatus.
Enough teachers and lab assistants have to be deployed throughout the week; while several experiments are being conducted, future experiments have to be prepared.
Planning must include disposal of waste chemicals and broken glass, and repair or disposal of spoilt items.
Consumables must be ordered before the current ones run out.
Worksheets and notes may have to be updated if there is a change of syllabus, or a change in question trends.
If you are a tuition centre, your practical training programme needs to be marketed via ads in social media or mass media.
To be continued …….
Singapore Learner has been a Comprehensive Science Practical Training provider since 2017.
As at 19 Apr 2026, we have trained about 1060 students for their science practical exams and we have conducted a total of about 4044 lab sessions.
Our laboratory apparatus are exam-grade and similar to those used in MOE schools and our chemicals are all NEA-approved.
If you are a private school, tuition centre or private study group with no science lab, or you are a tutor who needs a science lab, you can
(A) COLLABORATE with us to provide regular or ad hoc science practical sessions for your students;
(B)OUTSOURCE your whole science practical programme to us, including topical training (which we can plan together), practical tests, revision sessions, prelim exam, and mock exams.
(C)REFER your students (and get referral fees) to us individually or in groups to fulfill their need for science practical revision.
(D)RENT our lab, apparatus and materials for the conduct of your own mid-year, end-of-year, prelim or mock practical exams or even the actual CIE practical exams (if you are a Cambridge-registered school).
Needless to say, we are currently working with a number of private schools to provide them with practical training and practical exams, and we have started planning for practical programmes for 2027, some of which will commence in Nov 2026. Thus if you would like to discuss with us about science practical programmes for your school or tuition centre in 2027, kindly meet us as soon as possible. Thank you!
We can provide science practicals for ALL THREE SCIENCES for the following levels:
1) A-LEVEL (H2 or CIE or Pearson Edexcel) / JC1-JC2 / IP Y5-Y6 / Grades 11 to 12.
2) O-LEVEL / GCSE / IP Y4 / Grade 10.
3) Pri 5 to Sec 3, or Grade 5 to Grade 9, IP Y1 to Y3
For enquiries, contact 88765498 (Admin) or send an email to singaporelearner@gmail.com.
In chemistry, qualitative analysis refers to the process of identifying what substances are present in an unknown sample. The emphasis is on the properties and reactions observed, rather than numeric measurements.
During qualitative analysis, you focus on:
the appearance of a substance;
colour changes or changes in physical state, such as the formation of a precipitate (solid) or the evolution of a gas; and
the interaction of the substance with test reagents such as litmus paper.
This differs from quantitative or volumetric analysis, which involves taking measurements to determine the amount or concentration of a substance.
You should be familiar with the standard chemical tests for the following ions and gases:
No practical tests involving sulfur dioxide are required.
A positive acidity test indicates the presence of H⁺ ions, whereas a positive alkalinity test shows the presence of OH⁻ ions.
General Guidelines for QA
Experimental Techniques and Skills
1. Apparatus
Use test‑tubes or boiling tubes to perform most tests. Boiling tubes are slightly larger and more heat‑resistant than standard test‑tubes.
Check that all glassware is clean, dry, and free from cracks before use.
For accurate colour observation, hold the test‑tube against a white tile or sheet of white paper for contrast.
2. Samples
Use a spatula for solids and a dropper for small liquid volumes.
Unless otherwise instructed, use:
not more than 1 cm depth of solid, or
not more than 2 cm depth of solution in a test‑tube.
Using excess samples can obscure reactions or cause safety hazards.
3. Technique
Work carefully and deliberately.
Unless stated otherwise, add reagents drop by drop.
Prepare all materials beforehand so you can focus on one test at a time.
When heating:
Hold the test‑tube with tongs or a holder.
Begin with gentle heating before increasing intensity.
Always point the mouth of the test‑tubeaway from yourself and others.
If the reaction becomes vigorous, remove it from the flame immediately.
Making and Recording Observations
After each test:
Record your observations immediately while they’re fresh.
Draw inferences and conclusions clearly and accurately.
Summarise these in your practical notes or report.
When recording data:
Include ALL noticeable observations — colour changes, precipitates formed, and gases evolved.
Use clear, specific terminology so that another person could replicate or understand your results easily.
1. Describing Colours
Always describe every colour change that takes place.
Use simple, accurate colour descriptions such as “blue,” “green,” “yellow,” “orange,” “brown,” “white,” or “black.”
If mixed colours appear and no exact shade can be determined, use compound terms such as red‑brown, blue‑green, or yellow‑green.
Avoid imprecise or hybrid colour phrases like red‑yellow (when “orange” is more accurate).
The words light or dark may be used for shades.
If a gas or liquid is clear and has no colour, describe it as colourless, not white.
2. States of Matter and Their Descriptions
(a) Solids
Describe solids as crystalline, powdery, or metallic in appearance.
When two solutions form an insoluble solid, that solid is called a precipitate.
A solid forming on another surface is a deposit, and one remaining after heating or filtration is a residue.
(b) Liquids
A solution is a uniform mixture of solute and solvent.
A cloudy or turbid liquid indicates a suspension — tiny particles are dispersed but not dissolved.
(c) Gases
Observe whether gases have distinctive smells but never inhale directly — waft gently toward your nose instead.
A solid that forms when a gas cools is called a sublimate or deposit.
(d) Changes Upon Heating
A solid may convert into another solid (residue) of different appearance.
Some solids decompose completely and leave no solid.
A few solids sublime, turning directly into gas.
When bubbles form in a liquid as a gas evolves, describe the observation as “effervescence is observed” instead of simply “a gas is produced.”
Procedures and Observations for Tests
Test for Aqueous Cations
Cations are typically identified using aqueous sodium hydroxide (NaOH) and aqueous ammonia (NH₄OH).
Procedure:
Place about 2 cm of the unknown solution into a test‑tube.
Tilt the tube slightly and add the reagent slowly down the side.
Observe any colour change or precipitate.
Return the tube upright and swirl gently.
Continue adding reagent in excess until no further change occurs.
Observation Checklist:
Whether a precipitate forms
Colour of the precipitate
Whether it is soluble in excess reagent
If ammonia gas is released when using NaOH
Summary Table: Tests and Observations for Common Cations
Cation
Aqueous Sodium hydroxide, NaOH(aq)
Aqueous Ammonia, NH₃(aq)
Adding a few drops
Adding excess
Adding a few drops
Adding excess
Aluminium ion (Al³⁺)
White ppt of Al(OH)₃
Dissolves to a colourless solution
White ppt
Insoluble
Zinc ion (Zn²⁺)
White ppt of Zn(OH)₂
Dissolves to colourless solution
White ppt
Dissolves to colourless solution
Calcium ion (Ca²⁺)
White ppt of Ca(OH)₂
Insoluble
No ppt
No change
Ammonium ion (NH₄⁺)
No ppt. On warming, NH₃ gas released; turns litmus blue.
No change
Copper(II) ion (Cu²⁺)
Light blue ppt of Cu(OH)₂
Insoluble
Light blue ppt
Dissolves in excess to dark blue solution
Iron(II) ion (Fe²⁺)
Green ppt of Fe(OH)₂
Insoluble; turns brown on standing
Green ppt
Insoluble; turns brown on standing
Iron(III) ion (Fe³⁺)
Red‑brown ppt of Fe(OH)₃
Insoluble
Red‑brown ppt
Insoluble
Note: Iron(II) hydroxide quickly oxidises in air to form brown iron(III) hydroxide.
If no precipitate appears with NaOH and no ammonia is evolved, the cation is likely a Group I metal (e.g. Na⁺, K⁺).
Test for Aqueous Anions
Anions are tested systematically using dilute nitric acid (HNO₃) first to eliminate interfering ions. When testing for nitrate, you must use another reagent because nitric acid itself contains nitrate ions.
Phase 1 : Test for Carbonate (CO₃²⁻) Add about 2 cm of the unknown sample to a test‑tube. Place a drop on red litmus paper. If the paper turns blue, add a few drops of dilute nitric acid. If effervescence occurs, confirm with the limewater test. A white ppt that dissolves on further bubbling proves the presence of carbonate ions (CO₃²⁻). If no gas forms, the sample is an alkali (contains OH⁻). If litmus stays red, move to the next phase.
Phase 2 : Test for Chloride (Cl⁻) or Iodide (Pure Chem) Acidify the solution from Phase 1 with nitric acid. Add aqueous silver nitrate down the side of the tube. Observation of a white precipitate confirms chloride ions. (Pure Chem: if a yellow ppt. is observed, then iodide ions confirmed) If no ppt forms, proceed to Phase 3.
Phase 3 : Test for Sulfate (SO₄²⁻) Add aqueous barium nitrate (Ba(NO₃)₂) to the previous acidified mixture. Formation of a white precipitate confirms sulfate ions (SO₄²⁻). If no ppt forms, proceed to Phase 4.
Phase 4 : Test for Nitrate (NO₃⁻) Place fresh solution (no nitric acid added) in a clean tube. Add aqueous sodium hydroxide and a small piece of aluminium foil. Warm gently. Test the gas with damp red litmus paper – if it turns blue, ammonia gas is produced, confirming nitrate ions.
Summary Table: Tests and Observations for Common Anions
Anion
Test
Observation
Carbonate ion (CO₃²⁻)
1. Test the solution with red litmus paper.
Red litmus paper turns blue.
2. Add dilute nitric acid.
Effervescence is observed.
3. Test for CO2by bubbling the gas through limewater.
The gas produced, CO2, forms a white precipitate of calcium carbonate in limewater that dissolves after more bubbling.
Chloride ion (Cl⁻)
Add dilute nitric acid, then aqueous silver nitrate.
Formation of a white precipitate of silver chloride (AgCl).
Sulfate ion (SO₄²⁻)
Add dilute nitric acid, then aqueous barium nitrate.
Formation of a white precipitate of barium sulfate (BaSO₄).
Nitrate (NO₃⁻)
1. Add NaOH and aluminium foil, then warm.
Effervescence is observed.
2. Test for ammonia gas with damp red litmus paper.
The gas produced, ammonia gas, turns damp red litmus paper blue.
Notes:
Always eliminate hydroxide and carbonate ions first using litmus and acid tests.
Test for nitrate only when other ions have been ruled out.
Test for Gases These procedures help you identify gases by their effects and reactions.
Phase 1: Determine Acidic, Basic, or Neutral Gas Hold damp red and blue litmus papers near the gas source. Red → Blue → Gas is ammonia (NH₃). Blue → Red → Could be CO₂, SO₂, or Cl₂ (proceed to Phase 2). Blue → Red then bleached → Chlorine (Cl₂) or Sulfur dioxide (SO₂). No change → Gas is neutral (H₂ or O₂). ⚠️ A yellow‑green gas indicates concentrated chlorine – a severe inhalation hazard.
Phase 2 : Testing Acidic Gases If blue litmus turns red (not bleached): bubble gas through limewater. A white precipitate dissolving in excess gas → Carbon dioxide. If blue litmus turns red and bleaches: hold acidified potassium manganate(VII) paper at tube mouth. Paper turns from purple to colourless → Sulfur dioxide. Paper stays purple → Chlorine. (Chlorine can also turn potassium iodide‑starch paper blue, but this confirmatory test is usually unnecessary.)
Phase 3 : Testing Neutral Gases Add a metal and apply a burning splint: “pop” sound → Hydrogen. Without metal, insert a glowing splint: relights → Oxygen.
Summary Table: Tests and Observations for Gases
Gas
Effect on Litmus
Further Test and Observation
Ammonia (NH₃)
Turns damp red litmus paper blue.
Carbon dioxide (CO₂)
Turns damp blue litmus paper red.
Formation of white precipitate when bubbled through limewater. With further bubbling, the white precipitate dissolves in limewater.
Chlorine (Cl₂)
Turns damp blue litmus paper red, then bleaches it.
Turns potassium iodide (KI) solution from colourless to brown Or Turns potassium iodide (KI) starch paper to purple or dark blue* *This is a positive test for an oxidising agent, Cl₂.
Hydrogen (H₂)
No observed change
A burning splint is extinguished with a “pop” sound.
Oxygen (O₂)
No observed change
A glowing splint is relighted.
Sulfur dioxide (SO₂)
Turns damp blue litmus paper red.
Turns acidified potassium manganate(VII) (KMnO₄) from purple to colourless** **This is a positive test for a reducing agent, SO₂.
⚠️ Some gases, like chlorine and sulfur dioxide, have pungent, irritating odours and can be poisonous. Always waft carefully, and do not inhale directly.
LOOKING FOR THE BEST PLACE TO DO YOUR SCIENCE PRACTICALS? JOIN US!
Singapore Learner has been a Comprehensive Science Practical Training provider since 2017.
As at 19 Apr 2026, we have trained about 1060 students for their science practical exams and we have conducted a total of about 4044 lab sessions.
Our laboratory apparatus are exam-grade and similar to those used in MOE schools and our chemicals are all NEA-approved.
We provide A-Level / H2 / IP and O-Level Physics, Chemistry, Biology and CombinedScience (Physics/Chemistry/Biology) PracticalTraining/Crash Course/Mock Exams for both local (eg. H2, Singapore-Cambridge) and international exams (CIE, Pearson Edexcel, IGCSE).
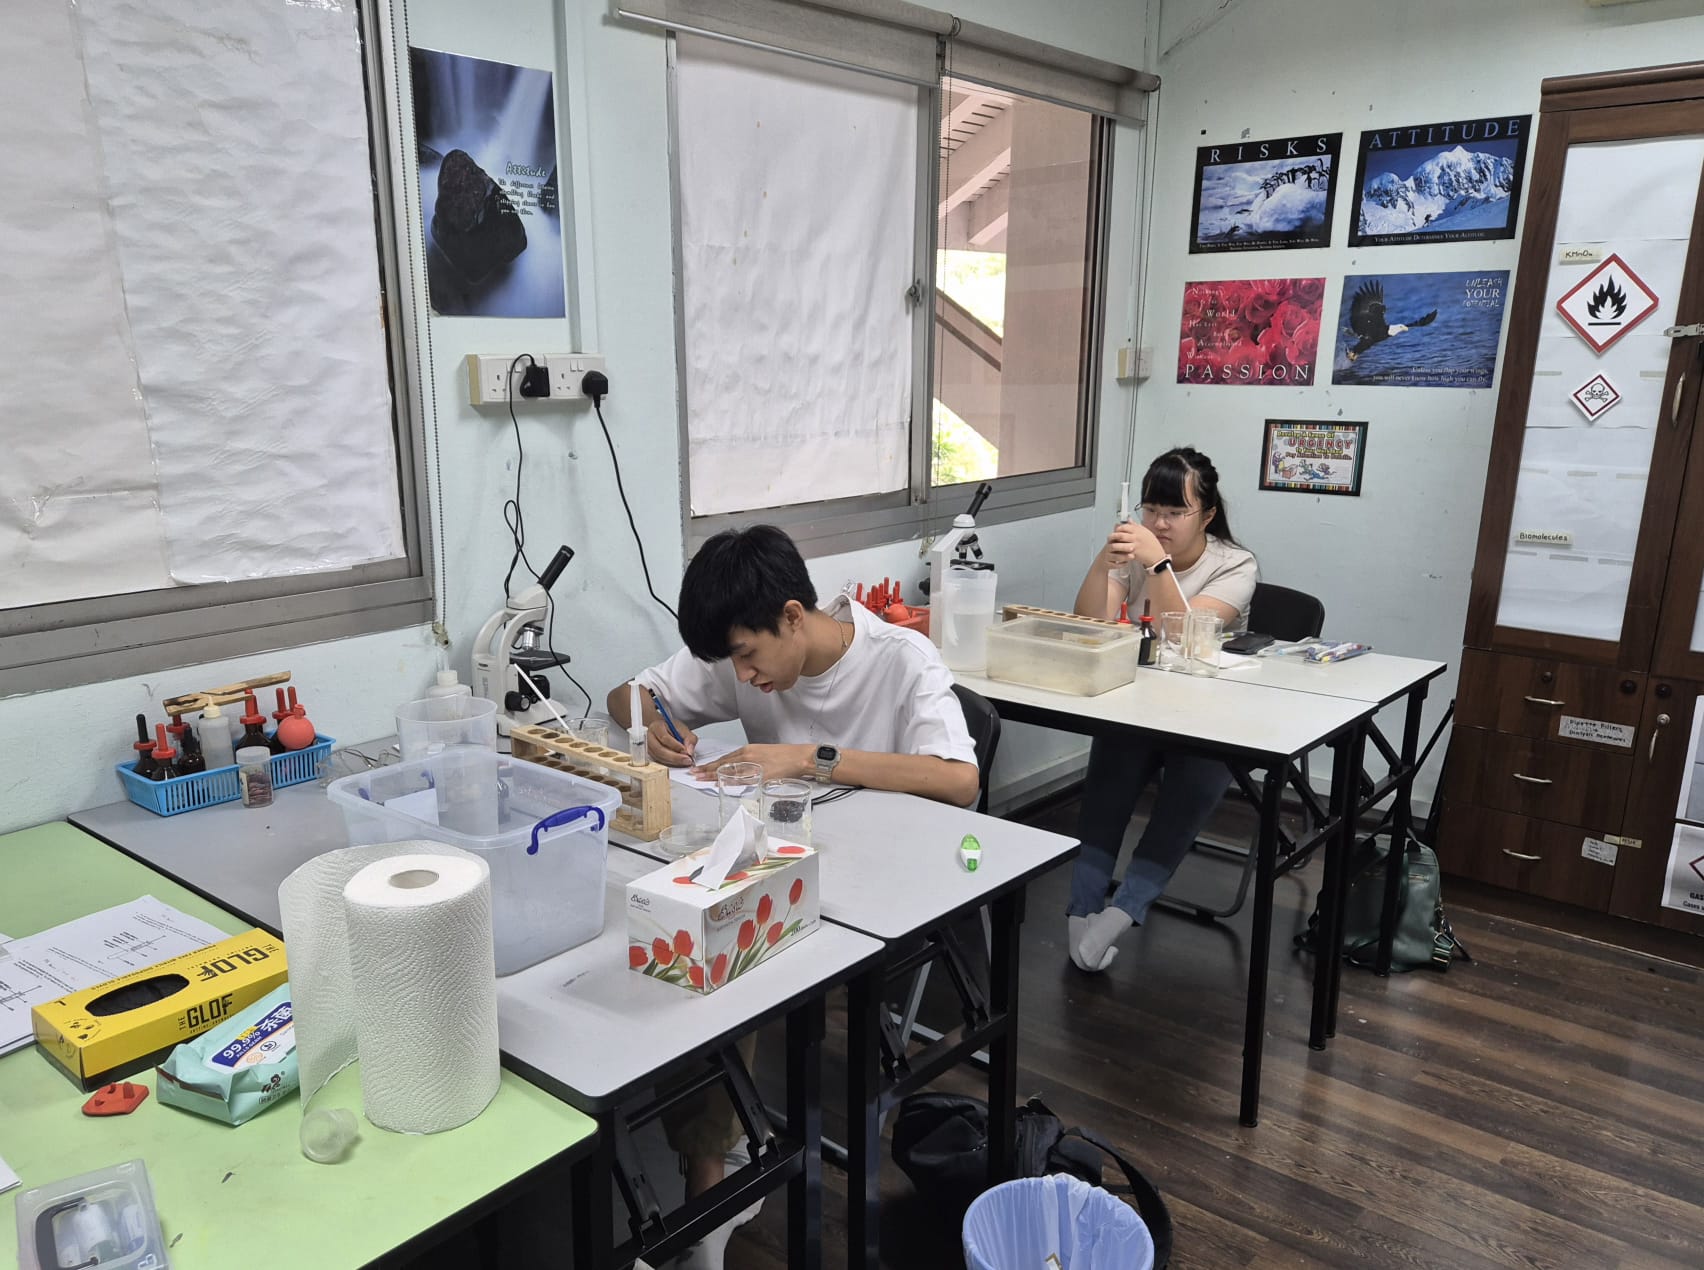
Why Choose Us?
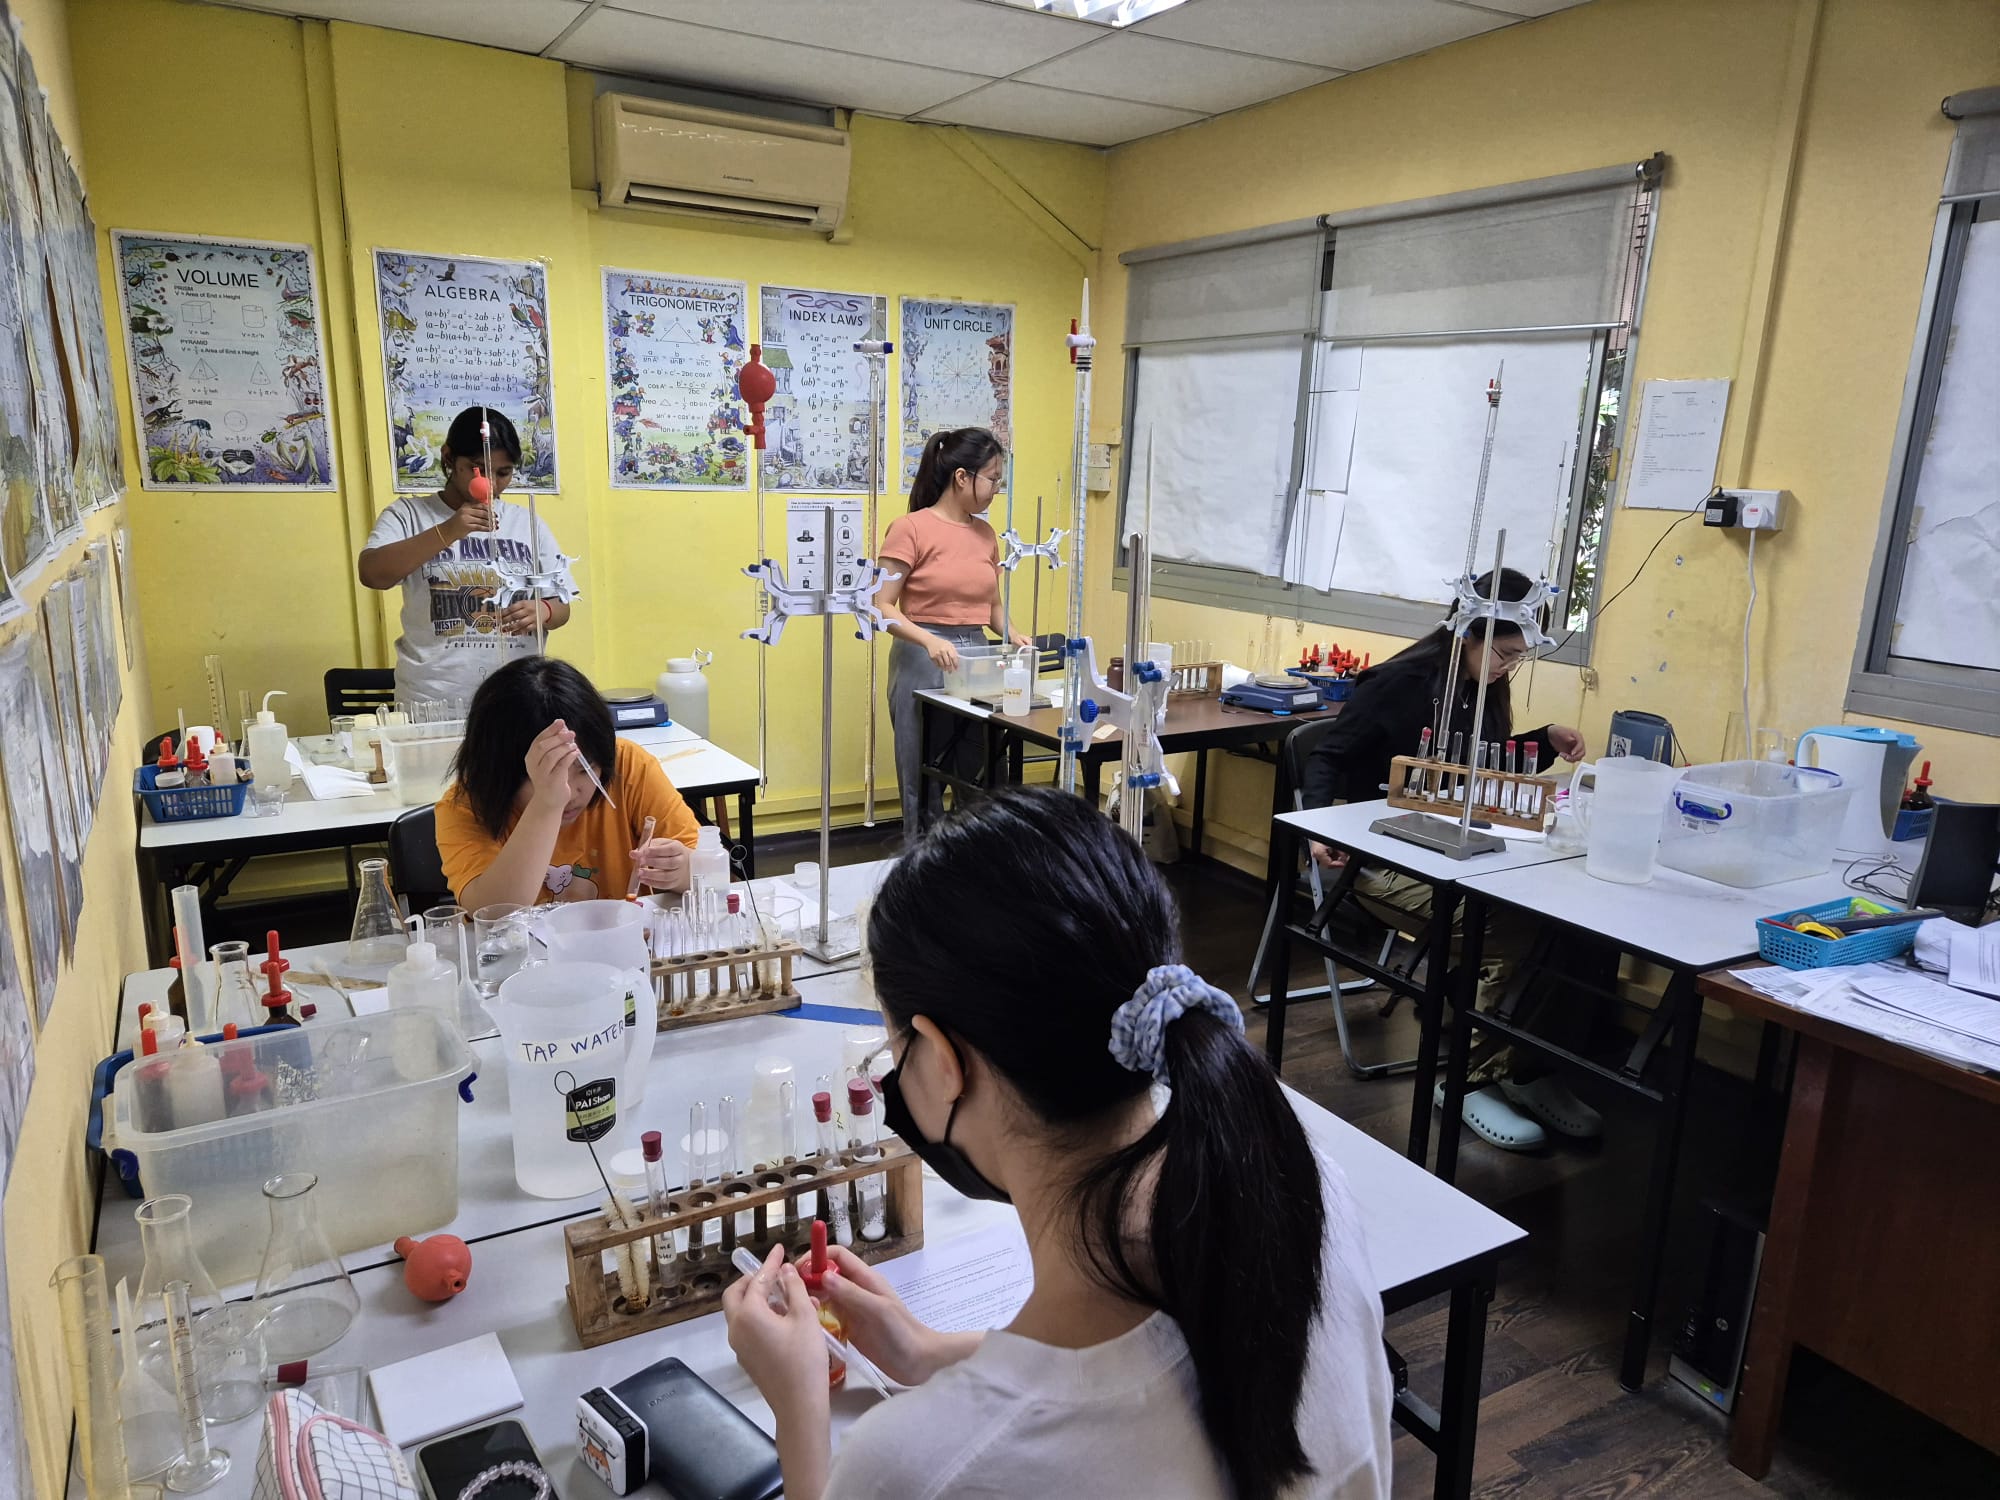
Our teachers are very experienced, and we actually TEACH you good practical techniques.
We have been a one-stop comprehensive science practical centre providing solid practical training for ALL THREE sciences and for all levels and streams since 2017.
Our laboratory apparatus are exam-grade and similar to those used in MOE schools and our chemicals are all NEA-approved.
We have a structured practical training programme catering to the needs of both beginners and experienced students.
We have a small class size so that the teacher is able to observe the actions of each student more closely and demonstrate the correct practical techniques where and when necessary.
Many private schools trust us to prepare and conduct science practical training and assessment for their students, including structured training, mock exams and even actual CIE science practical exams.
Operations: Perform calculations including sines, cosines, tangents (and their inverse) using radian, as well as exponentials and logarithms (lg and ln).
Scientific Notation: Correctly inputting and displaying values in scientific notation (e.g., 3.00E + 14 for 3.00 x 10¹⁴ ).
Formula Duplication: Writing a formula once and using “fill” features to duplicate it across multiple cells efficiently.
Data Type Adjustment: Adjusting formatting for different data types (e.g., number of decimal places or percentage) and duplicating across different cells.
Graphing and Trendlines
Scales and Labels: Plotting labeled line graphs and adjusting the scales of both axes for clarity.
Linear Trendlines: Using built-in functions to add a best fit line through the data points and displaying the equation of the trendline.
If you need more more Excel practice in the three important skills above (importing data file, plotting graph and trendline, summation of trapezoidal area), don’t hesitate to sign up for any of our training labs, exam paper labs, crash courses or mock exams (see below).
We have sixteen H2 Physics practical worksheets requiring students to use Excel to handle data and plot graphs.
For enquiries, contact 88765498 (Lab Coordinator).
H2 PHYSICS PRACTICAL TRAINING
We provide A-Level / H2 and O-Level Physics, Chemistry, Biology and Science (Physics/Chemistry/Biology) Practical training for private / school candidates and homeschoolers, for both local (eg. H2, Singapore-Cambridge) and international exams (CIE, IGCSE).
Paper 4 (Practical) is weighted to 20% of the Higher 2 assessment.
SKILL AREAS FOR PRACTICAL EXAM
General practical skill areas in which students will be assessed are as follows:
(a) Planning
(b) Manipulation, measurement and observation.
(c) Presentation of data and observations.
(d) Analysis, conclusions and evaluation.
Students doing the older 9749 syllabus are expected to draw graphs and calculate gradients manually using graph paper.
Students doing the new 9478 syllabus (2026 onwards) are expected to draw graphs and make calculations using Excel spreadsheets (see link below):
TOPICS FOR PRACTICAL EXAM
The topics to be examined for the H2 Physics practical exam are not stated in the new syllabus, but based on past papers, candidates are expected to have been exposed to a range of topics and experimental techniques such as:
Measurement and Uncertainty, including the use of vernier callipers and the micrometer screw gauge
Calculation of percentage errors
Precision of instruments, including decimal places and significant figures
Kinematics and Forces, including the use of the Newton-meter, springs and pulleys.
Period of Oscillations
Moments and Centre of Gravity
Thermal Physics
Electricity, including the use of potentiometers, diodes, capacitors and digital multimeters
Electromagnetism
Recording of observations in tables and plotting of graphs
Identification of Sources of Error in experiments and ways to overcome them
Planning an experiment including identification of independent, dependent and control variables as well as safety precautions
OUR STRUCTURED PRACTICAL TRAINING SYSTEM
Based on the above syllabus, we have several structured programs for you, depending on whether you are a private or school candidate.
PRIVATE CANDIDATES
If you are a private candidate, for each subject, you must complete 4 Basic practicals plus a further 4 Exam-Paper-Style practicals, before we issue you a certificate to acknowledge that you have completed a sufficient amount of practical training necessary for your actual exam. Beyond these 8 practical sessions, you may also opt to attend our Practical Crash Courses and our Practical Mock Exams in June, September or October.
SCHOOL CANDIDATES
If you are a current school candidate, you may select any of the training labs found in our schedule, and you are strongly encouraged to sign up early for our Practical Crash Courses and our Practical Mock Exams which will be held in March, June, September or October.
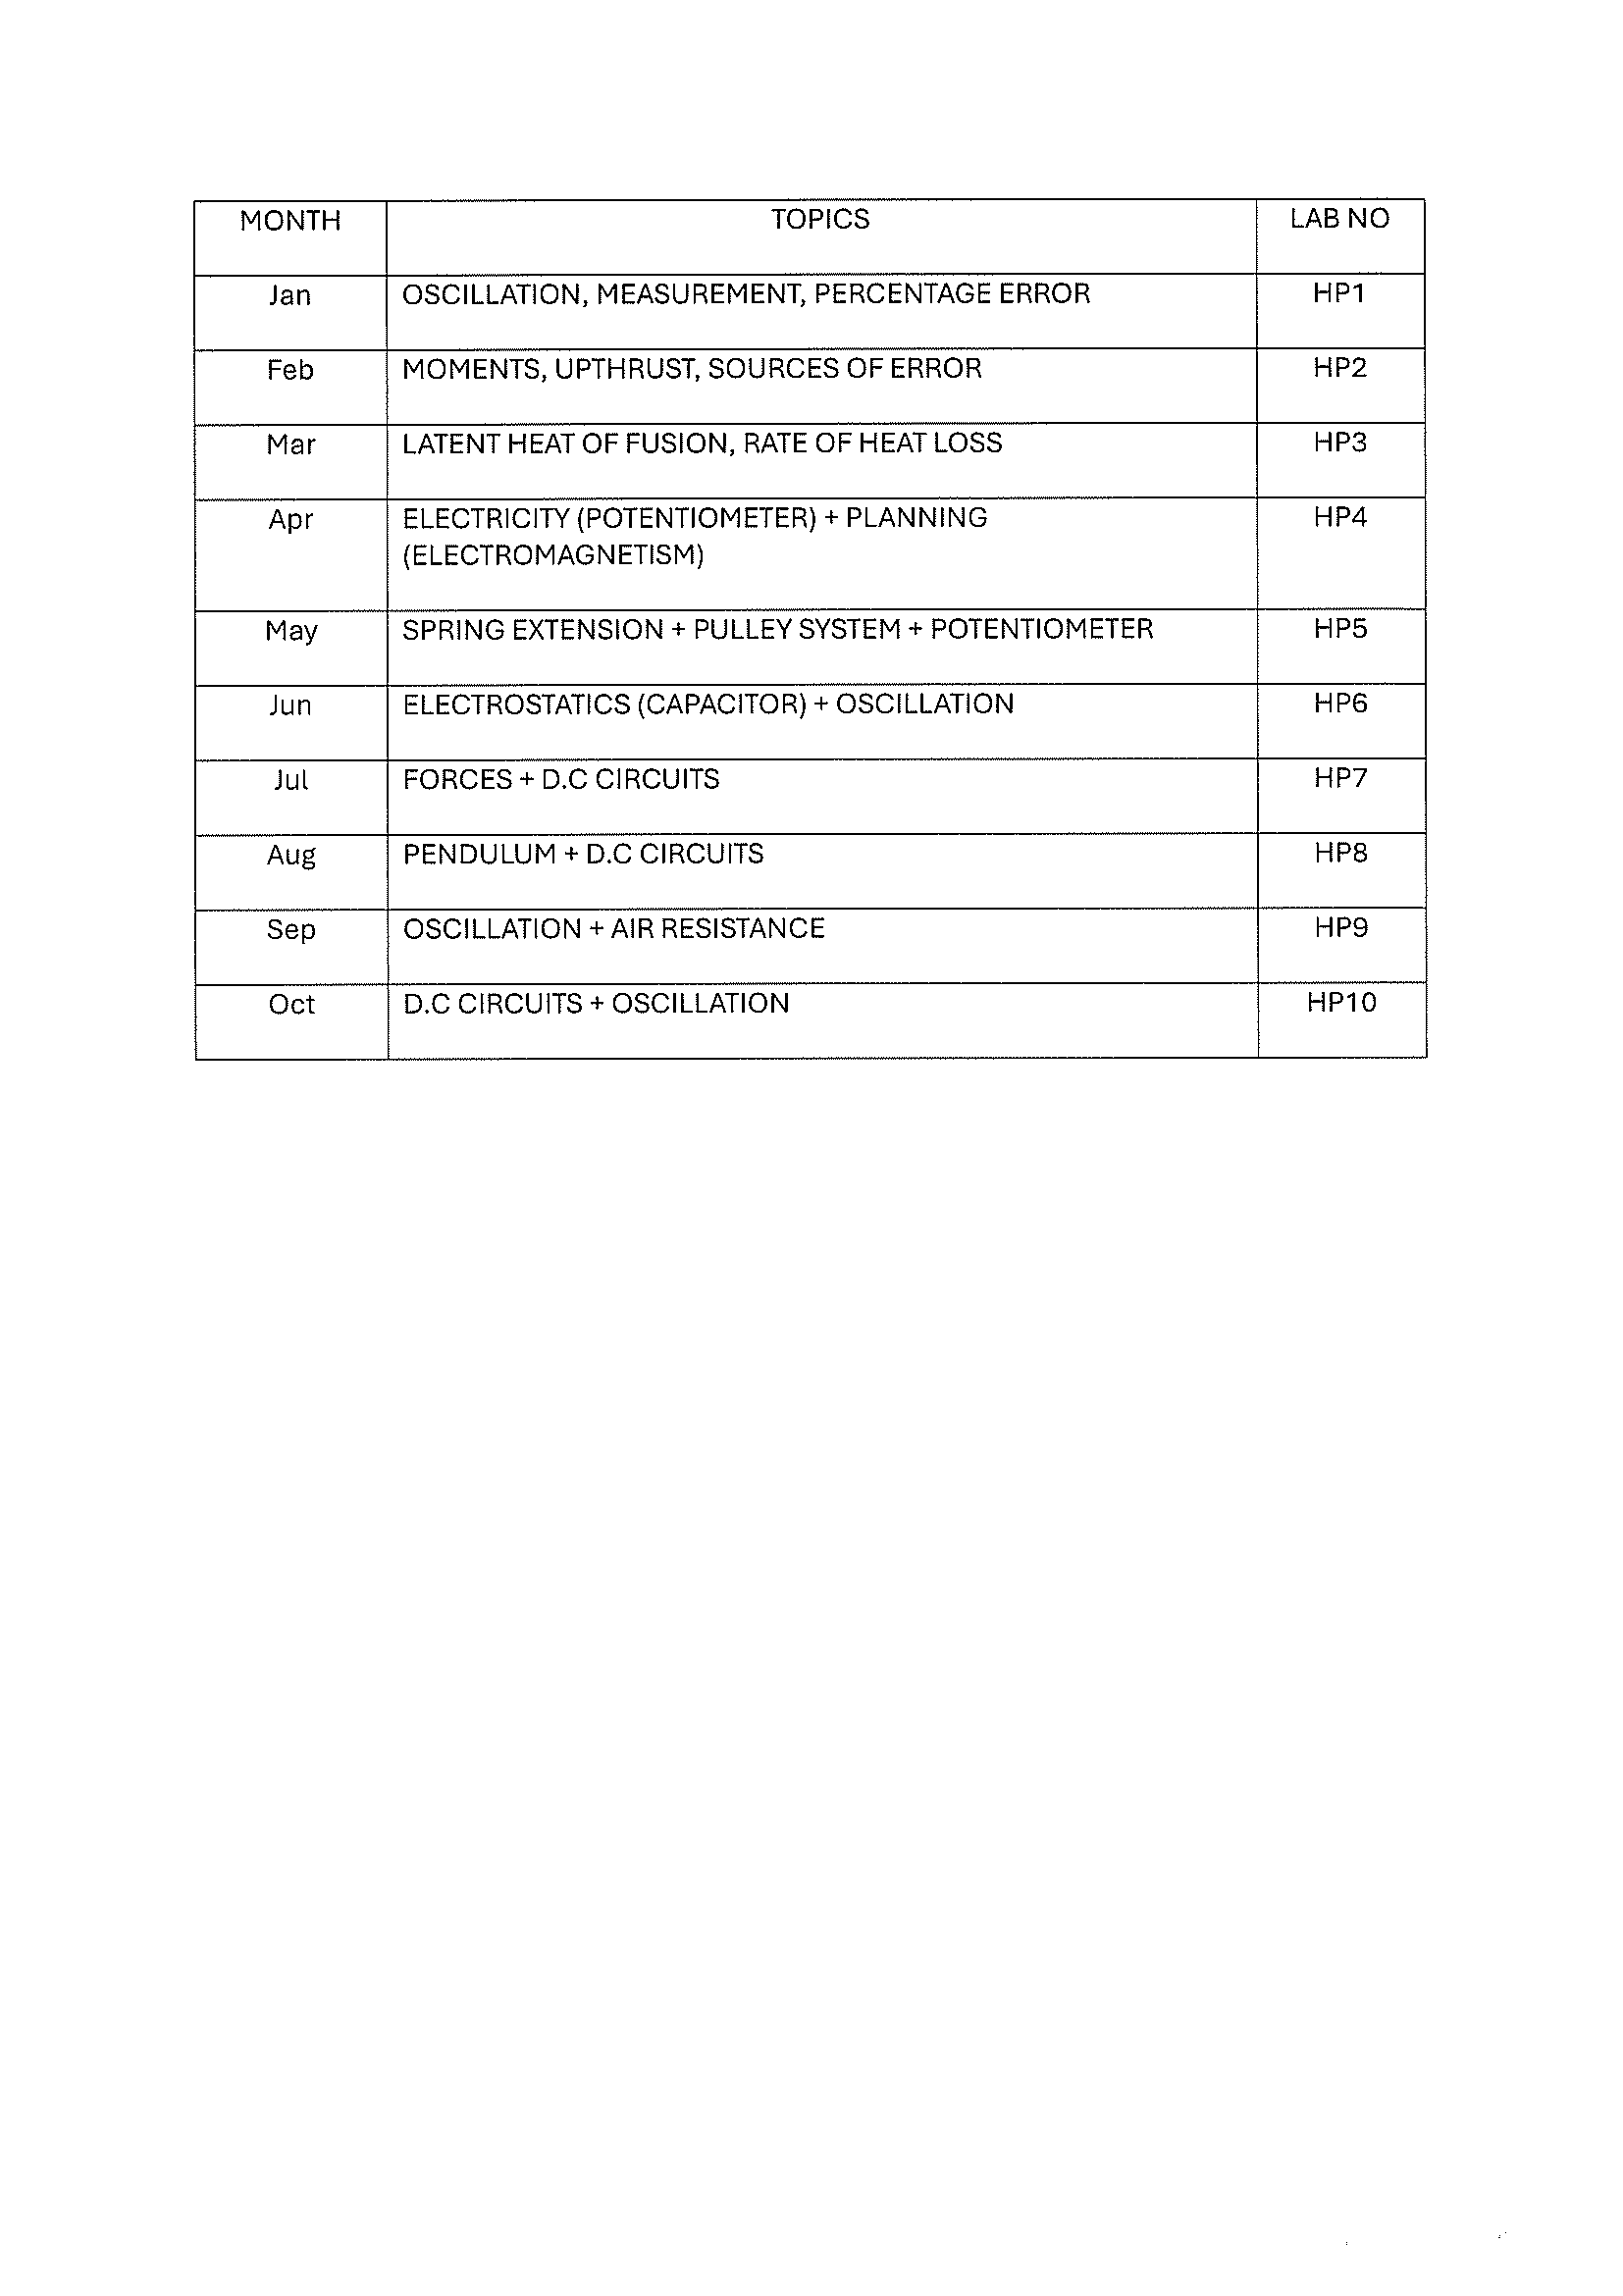
OUR H2 PHYSICS PRACTICAL SCHEDULE (Jan to Oct)
*Other labs, such as HP11-16, are also available for those who want further training or as mock exams.
*All our H2 Physics lab sessions are available in both the old (non-Excel) and new (Excel) formats.
*If you sign up after January, we will adjust the above schedule for you but you may have to attend more than one practical session per month per subject.
IMPORTANT POINTS TO NOTE:
The above is the ideal schedule for students who want to excel in their H2 Physics practical exams, by starting in Jan and having a final practical revision or mock exam in Oct. The practical sessions are well spread out, giving students time to study the theory components as well as other subjects. Thus it is highly recommended that you commence your practical training in January.
HOW TO BOOK A LAB SESSION:
(1) Decide which Program or Lab sessions you need or most suitable for.
(2) Whatsapp or Message our staff at 88765498 with your Name, Private or School Candidate, A or O level, Subject or Lab Name (e.g Lab PP2), Date and Time of Lab. (Our staff will then guide you on how to register and make payment. If you are not sure about the lab sessions, just state your Name and the Subjects and we will get back to you)
(3) Register Online by clicking below:
(4) Pay Registration fee of $50 via Paynow or funds transfer.
(5) Make the required payment for each lab session at least 7 days before the date of the lab session. (You may also pay for several sessions at one go to ensure that you will have a place in future slots)
Lab HP2: MOMENTS, UPTHRUST, SOURCES OF ERROR (TOPICAL TRAINING) (Available sessions : (JAN – AUG, CONFIRM WITH ADMIN)
Lab HP3: LATENT HEAT OF FUSION, RATE OF HEAT LOSS (TOPICAL TRAINING) (Available sessions: (JAN- AUG , CONFIRM SLOT WITH ADMIN)
Lab HP4: ELECTRICITY (POTENTIOMETER 4) + PLANNING (ELECTROMAGNETISM) (TOPICAL TRAINING) (Available sessions: (JAN – AUG , CONFIRM SLOT WITH ADMIN)
Note: The above 4 labs are BASIC TRAINING LABS which are available throughout the year, every week every month, as they are compulsory for all private candidates. Thus if the date you can attend is not listed above, please message our Admin at 88765498 for a new schedule.
STANDARD LABS:
Lab HP5: SPRING EXTENSION + PULLEY 5 + POTENTIOMETER 5 (EXAM PAPER TRAINING) (Available sessions: (CONFIRM SLOT WITH ADMIN)
Lab HP6: ELECTROSTATICS (CAPACITOR) + OSCILLATION 6 (EXAM PAPER TRAINING) (Available sessions: (CONFIRM SLOT WITH ADMIN)
Lab HP7: FORCES 7 + D.C CIRCUITS 7 (EXAM PAPER TRAINING) (Available sessions: (CONFIRM SLOT WITH ADMIN)
Lab HP8: PENDULUM 8 + D.C CIRCUITS 8 (EXAM PAPER TRAINING) (Available sessions: (CONFIRM SLOT WITH ADMIN)
Lab HP9: OSCILLATION 9 + AIR RESISTANCE (EXAM PAPER TRAINING) (Available sessions: (CONFIRM SLOT WITH ADMIN)
Lab HP10: D.C CIRCUITS 10 + OSCILLATION 10 (EXAM PAPER TRAINING) (Available session : (AUG-OCT,CONFIRM SLOT WITH ADMIN)
Lab HP11: INCLINED PLANE + POTENTIOMETER 11 (EXAM PAPER TRAINING) (Available sessions: (AUG-OCT,CONFIRM SLOT WITH ADMIN)
Lab HP12: UPTHRUST 12 + POTENTIOMETER 12 + OSCILLATION 12 (FULL PAPER MOCK EXAM) (Available Session: (AUG-OCT,CONFIRM SLOT WITH ADMIN)
Lab HP13: FRICTION 13 + OSCILLATION 13 + POTENTIOMETER 13 (FULL PAPER MOCK EXAM) (Available Session: (SEPT-OCT,CONFIRM SLOT WITH ADMIN)
Lab HP14: OSCILLATION OF WIRE + RATE OF HEAT LOSS + POWER OF A RESISTOR (FULL PAPER MOCK EXAM) (Available session: (AUG-OCT,CONFIRM SLOT WITH ADMIN))
Lab HP15: PENDULUM 15 + FRICTION 15 + POTENTIOMETER 15 (FULL PAPER MOCK EXAM) (Available sessions: (SEPT-OCT,CONFIRM SLOT WITH ADMIN)
2022: Oscillation (slotted masses hanging from a string), W.E.P, Electricity (not potentiometer)
2023:
The first question (14m) was on circuits, construct a circuit with a wire-jockey potentiometer and a fixed resistor in parallel, then vary the fixed resistors (we were given 5 in total) while adjusting the length of the wire in contact with the jockey to keep the ammeter reading in the circuit constant.
The second question (8m) was on oscillations, where there was a short stick with two metal balls hanging from it by strings, and a diagonal stick crossing the strings which allowed the length of string to be varied and hence the period of oscillation.
The third question (22m) was on forces where students had to build a cantilever by hanging one edge of a meter rule off the table while the other edge remained on the table, and placing weights on it to find the balance point, then do calculations.
The planning question was on measuring background radioactivity count rate for different distances from a building and from the ground.
What you will get at each practical session:
(1) Teaching and instruction on how to use the various scientific tools and instruments.
(2) Tips on how to answer a practical worksheet or exam paper, including recording of observations, drawing graphs, writing conclusions, describing precautions and planning a practical.
(3) Notes on important aspects of science practicals.
We will also conduct Mock Practical Exams in September and October
LOOKING FOR THE BEST PLACE TO DO YOUR SCIENCE PRACTICALS? JOIN US!
We provide A-Level / H2 / IP and O-Level Physics, Chemistry, Biology and Science (Physics/Chemistry/Biology) PracticalTraining for both local (eg. H2, Singapore-Cambridge) and international exams (CIE, IB, IGCSE).
Enjoy great discounts when you join us for Science Practical Training in the Dec-Jan period!
FIVE Reasons Why You Should Start Your Science Practical Training EARLY:
It will give you more time to focus on your theory revision near the exam dates.
You can identify shortcomings in your practical knowledge and skills early so that you will have enough time to rectify them.
You will be able to complete more practical lessons and cover more topics to build up your confidence in doing your science practicals fast and correctly.
You will be able to spread out your science practical training and revision at a more comfortable pace (like just once a month) to facilitate timely reinforcement.
Higher availability of science practical lessons to suit your schedule
For details on Practical Courses, Mock Exams or Schedules, kindly click on any of the above links relevant to the exam and level you will be doing.
Why Us?
Our teachers are highly qualified and very experienced, and we actually TEACH you good practical techniques.
We have been a one-stop comprehensive science practical centre providing solid practical training for ALL THREE sciences and for all levels and streams since 2017.
Our laboratory apparatus are exam-grade and the same as those used in MOE schools and our chemicals are all NEA-approved.
We have a structured practical training programme catering to the needs of both beginners and experienced students.
We have a small class size so that the teacher is able to observe the actions of each student more closely and demonstrate the correct practical techniques where and when necessary.
You may need science practical lessons if you are a private candidate who needs a science lab and apparatus as well as practical coaching, or you are a school candidate who needs more practical training to get top grades.
IMPORTANT INFORMATION FOR PRIVATE CANDIDATES
The registration for ‘A’ and ‘O’ Level exams as a private candidate usually opens around early to mid-April (Please check SEAB website). If you are registering for a Science subject (Physics, Chemistry, Biology or Combined Sciences), at the time of registration in April, you will be asked whether you have done any science practical training in any school, centre, or institute.
Thus if you are considering Singapore Learner as your science practical training provider, you are strongly advised to register with us and begin your science practical sessions for each subject BEFORE APRIL for us to certify that you have attended basic science practical training. Thus it is recommended that you commence practical training with us in Jan/Feb. Please note students usually do about 10 practical sessions per subject to be competent in practicals.
The following is taken from SEAB website:
“If you are registering for a Science subject with a practical paper, you: • Must have sat the same Science subject(s) previously, OR • are currently attending or will be attending a course of instruction in Science practical at any institute/school. You must complete the course of instruction in Science practical at the institute/school enrolled in. You are required to declare that you have fulfilled the above requirements at the point of registration.Registration for the subject may be cancelled without a refund of the examination fees if a false declaration is made.“
Year 2 to JC1 Head-Start Physics Course (3 Weeks, 2 Lessons per Week)
Overall Structure
• Duration: 3 weeks × 2 lessons per week (total of 6 lessons)
• Lesson length: ~1.5 hours each (≈ 9 hours total)
• Lesson format: 40% conceptual exploration (lectures, demos), 30% guided problem-solving, 20% independent problem solving, 10% “look-ahead” mini-projects or real-world applications.
• Goal: expose students to some important topics in their next year of studies, and allow them to explore further into these topics.
1. Transition: Year 2 → Year 3
Theme: From Intuitive to Quantitative Physics
Goal: Help students see that physics is based on mathematical modeling and experimental evidence.
Lesson Topic and Learning Outcomes
1 Physical Quantities and Units Use significant figures, prefixes (milli-, micro-), and scientific notation. Understand precision and accuracy.
2 Kinematics: Describing Motion Understand displacement, velocity, and acceleration. Interpret displacement–time and velocity–time graphs.
3 Forces and Newton’s Laws Introduce Newton’s 3 Laws, free-body diagrams, and resultant forces.
4 Energy and Work Define work, energy, and conservation of energy. Understand kinetic and potential energy.
5 Introduction to Graphical Analysis Plot data, find gradients, and interpret areas under curves (e.g., v-t to displacement).
6 Mini-Project Perform a simple pendulum or rolling-ball experiment to determine acceleration and compare with equations of motion.
Skill focus: dimensional reasoning, proportional thinking, and algebraic manipulation.
2. Transition: Year 3 → Year 4
Theme: From Classical Mechanics to Fields and Waves
Goal: Bridge Newtonian motion to abstract field and wave concepts.
Lesson Topic and Learning Outcomes
1 Motion & Forces in Two Dimensions Apply Newton’s laws to circular motion and centripetal force.
2 Gravitational & Electric Fields (Conceptual) Understand “action at a distance,” field lines, and potential energy diagrams.
3 Work, Power, and Energy Revisited Connect mechanical and electrical power; apply efficiency concepts.
4 Waves: Nature and Properties Explore transverse vs longitudinal waves, wavelength, frequency, and the wave equation v = fλ.
5 Applied Exploration: Students are tasked to use their mobile phones with applications to explore some physical quantities in real life.
Goal: Prepare students for A-Level or IB-style analytical reasoning using vectors and algebraic modeling.
Lesson Topic and Learning Outcomes
1 Mathematical Tools of Physics Resolve vectors, understand components, and apply trigonometry in force systems.
2 Circular Motion Learn about how to use vectors and vector analysis to quantitatively and analytically describe motion in a circle.
3 Energy and Momentum Apply conservation laws in 1D and 2D collisions.
4 Fields and Potentials Interpret equipotential lines, inverse-square laws, and field strength vs potential.
5 Oscillations & SHM Study period, amplitude, restoring force, energy exchange, and phase.
Duration: 2 weeks (4 lessons, ~8 hours total)
Target group: JC1 students entering JC2 who performed decently well and want a head start on challenging topics.
Course Overview
• Focus on Thermal Physics and Quantum Physics, the two most conceptually difficult JC2 topics.
• Build early intuition and get exposed to formal derivations
• Emphasize conceptual understanding over question solving
• Suitable for motivated students aiming for A-level distinction or smoother transition into JC2.
Week 1 – Thermal Physics Foundations
Lesson 1 – Microscopic View of Temperature and Gases
• What temperature really measures (average kinetic energy).
• Link macroscopic quantities (P, V, T) to particle motion.
• Derive and interpret frequently used formulae.
• Activities: particle-motion simulations, PV-graph sketching, quick derivation.
Lesson 2 – Energy Exchange and the First Law of Thermodynamics
• Define heat, internal energy, and work.
• Apply the First Law of thermodynamics
• Interpret PV diagrams: isothermal, adiabatic, cyclic processes.
• Real-world links: engines, refrigerators, efficiency.
• Activities: PV-loop exercises, simple calorimetry discussion.
Week 2 – Quantum Physics Foundations
Lesson 3 – Breakdown of Classical Physics and Photoelectric Effect
• Planck’s quantization E = hf.
• Einstein’s photon model and photoelectric effect.
Lesson 4 – Wave–Particle Duality and Energy Levels
• de Broglie wavelength.
• Electron double-slit experiment and standing waves.
• Particle-in-a-box model and quantized energies.
• Atomic emission spectra and quantum transitions.
• Activities: visualizations, simple computation of energy levels.
Teaching Approach
• Inquiry-based discussion and visual demonstrations.
• Emphasis on physical intuition before equations.
• Short practice sets at the end of each lesson (conceptual + numerical).
Expected Outcomes
By the end of the camp, students will:
• Understand the molecular basis of temperature and energy.
• Appreciate the limitations of classical physics and origins of quantum theory.
• Recognize how quantization explains spectra and modern devices.
• Enter JC2 with confidence and conceptual readiness.
For budding scientists from Primary 4 to Secondary 2.
Ignite your child’s inner Einstein! Give your child hands-on experiences in Physics & Chemistry during 4 science practical labs that can nourish inquisitive young minds and unlock the door to exploring STEM in a cozy class of fellow science explorers. Spark that interest. Nurture that curiosity. Let their thinking grow.