If you are interested in gaining work experience in any or some of these areas – educational materials, teaching (science practicals), science lab preparation and upkeeping, administration or marketing, you may apply to be a paid intern in our company.
We are open for internship from March to October.
For enquiries, please send an email to singaporelearner@gmail.com.
In chemistry, qualitative analysis refers to the process of identifying what substances are present in an unknown sample. The emphasis is on the properties and reactions observed, rather than numeric measurements.
During qualitative analysis, you focus on:
the appearance of a substance;
colour changes or changes in physical state, such as the formation of a precipitate (solid) or the evolution of a gas; and
the interaction of the substance with test reagents such as litmus paper.
This differs from quantitative or volumetric analysis, which involves taking measurements to determine the amount or concentration of a substance.
You should be familiar with the standard chemical tests for the following ions and gases:
No practical tests involving sulfur dioxide are required.
A positive acidity test indicates the presence of H⁺ ions, whereas a positive alkalinity test shows the presence of OH⁻ ions.
General Guidelines for QA
Experimental Techniques and Skills
1. Apparatus
Use test‑tubes or boiling tubes to perform most tests. Boiling tubes are slightly larger and more heat‑resistant than standard test‑tubes.
Check that all glassware is clean, dry, and free from cracks before use.
For accurate colour observation, hold the test‑tube against a white tile or sheet of white paper for contrast.
2. Samples
Use a spatula for solids and a dropper for small liquid volumes.
Unless otherwise instructed, use:
not more than 1 cm depth of solid, or
not more than 2 cm depth of solution in a test‑tube.
Using excess samples can obscure reactions or cause safety hazards.
3. Technique
Work carefully and deliberately.
Unless stated otherwise, add reagents drop by drop.
Prepare all materials beforehand so you can focus on one test at a time.
When heating:
Hold the test‑tube with tongs or a holder.
Begin with gentle heating before increasing intensity.
Always point the mouth of the test‑tubeaway from yourself and others.
If the reaction becomes vigorous, remove it from the flame immediately.
Making and Recording Observations
After each test:
Record your observations immediately while they’re fresh.
Draw inferences and conclusions clearly and accurately.
Summarise these in your practical notes or report.
When recording data:
Include ALL noticeable observations — colour changes, precipitates formed, and gases evolved.
Use clear, specific terminology so that another person could replicate or understand your results easily.
1. Describing Colours
Always describe every colour change that takes place.
Use simple, accurate colour descriptions such as “blue,” “green,” “yellow,” “orange,” “brown,” “white,” or “black.”
If mixed colours appear and no exact shade can be determined, use compound terms such as red‑brown, blue‑green, or yellow‑green.
Avoid imprecise or hybrid colour phrases like red‑yellow (when “orange” is more accurate).
The words light or dark may be used for shades.
If a gas or liquid is clear and has no colour, describe it as colourless, not white.
2. States of Matter and Their Descriptions
(a) Solids
Describe solids as crystalline, powdery, or metallic in appearance.
When two solutions form an insoluble solid, that solid is called a precipitate.
A solid forming on another surface is a deposit, and one remaining after heating or filtration is a residue.
(b) Liquids
A solution is a uniform mixture of solute and solvent.
A cloudy or turbid liquid indicates a suspension — tiny particles are dispersed but not dissolved.
(c) Gases
Observe whether gases have distinctive smells but never inhale directly — waft gently toward your nose instead.
A solid that forms when a gas cools is called a sublimate or deposit.
(d) Changes Upon Heating
A solid may convert into another solid (residue) of different appearance.
Some solids decompose completely and leave no solid.
A few solids sublime, turning directly into gas.
When bubbles form in a liquid as a gas evolves, describe the observation as “effervescence is observed” instead of simply “a gas is produced.”
Procedures and Observations for Tests
Test for Aqueous Cations
Cations are typically identified using aqueous sodium hydroxide (NaOH) and aqueous ammonia (NH₄OH).
Procedure:
Place about 2 cm of the unknown solution into a test‑tube.
Tilt the tube slightly and add the reagent slowly down the side.
Observe any colour change or precipitate.
Return the tube upright and swirl gently.
Continue adding reagent in excess until no further change occurs.
Observation Checklist:
Whether a precipitate forms
Colour of the precipitate
Whether it is soluble in excess reagent
If ammonia gas is released when using NaOH
Summary Table: Tests and Observations for Common Cations
Cation
Aqueous Sodium hydroxide, NaOH(aq)
Aqueous Ammonia, NH₃(aq)
Adding a few drops
Adding excess
Adding a few drops
Adding excess
Aluminium ion (Al³⁺)
White ppt of Al(OH)₃
Dissolves to a colourless solution
White ppt
Insoluble
Zinc ion (Zn²⁺)
White ppt of Zn(OH)₂
Dissolves to colourless solution
White ppt
Dissolves to colourless solution
Calcium ion (Ca²⁺)
White ppt of Ca(OH)₂
Insoluble
No ppt
No change
Ammonium ion (NH₄⁺)
No ppt. On warming, NH₃ gas released; turns litmus blue.
No change
Copper(II) ion (Cu²⁺)
Light blue ppt of Cu(OH)₂
Insoluble
Light blue ppt
Dissolves in excess to dark blue solution
Iron(II) ion (Fe²⁺)
Green ppt of Fe(OH)₂
Insoluble; turns brown on standing
Green ppt
Insoluble; turns brown on standing
Iron(III) ion (Fe³⁺)
Red‑brown ppt of Fe(OH)₃
Insoluble
Red‑brown ppt
Insoluble
Note: Iron(II) hydroxide quickly oxidises in air to form brown iron(III) hydroxide.
If no precipitate appears with NaOH and no ammonia is evolved, the cation is likely a Group I metal (e.g. Na⁺, K⁺).
Test for Aqueous Anions
Anions are tested systematically using dilute nitric acid (HNO₃) first to eliminate interfering ions. When testing for nitrate, you must use another reagent because nitric acid itself contains nitrate ions.
Phase 1 : Test for Carbonate (CO₃²⁻) Add about 2 cm of the unknown sample to a test‑tube. Place a drop on red litmus paper. If the paper turns blue, add a few drops of dilute nitric acid. If effervescence occurs, confirm with the limewater test. A white ppt that dissolves on further bubbling proves the presence of carbonate ions (CO₃²⁻). If no gas forms, the sample is an alkali (contains OH⁻). If litmus stays red, move to the next phase.
Phase 2 : Test for Chloride (Cl⁻) or Iodide (Pure Chem) Acidify the solution from Phase 1 with nitric acid. Add aqueous silver nitrate down the side of the tube. Observation of a white precipitate confirms chloride ions. (Pure Chem: if a yellow ppt. is observed, then iodide ions confirmed) If no ppt forms, proceed to Phase 3.
Phase 3 : Test for Sulfate (SO₄²⁻) Add aqueous barium nitrate (Ba(NO₃)₂) to the previous acidified mixture. Formation of a white precipitate confirms sulfate ions (SO₄²⁻). If no ppt forms, proceed to Phase 4.
Phase 4 : Test for Nitrate (NO₃⁻) Place fresh solution (no nitric acid added) in a clean tube. Add aqueous sodium hydroxide and a small piece of aluminium foil. Warm gently. Test the gas with damp red litmus paper – if it turns blue, ammonia gas is produced, confirming nitrate ions.
Summary Table: Tests and Observations for Common Anions
Anion
Test
Observation
Carbonate ion (CO₃²⁻)
1. Test the solution with red litmus paper.
Red litmus paper turns blue.
2. Add dilute nitric acid.
Effervescence is observed.
3. Test for CO2by bubbling the gas through limewater.
The gas produced, CO2, forms a white precipitate of calcium carbonate in limewater that dissolves after more bubbling.
Chloride ion (Cl⁻)
Add dilute nitric acid, then aqueous silver nitrate.
Formation of a white precipitate of silver chloride (AgCl).
Sulfate ion (SO₄²⁻)
Add dilute nitric acid, then aqueous barium nitrate.
Formation of a white precipitate of barium sulfate (BaSO₄).
Nitrate (NO₃⁻)
1. Add NaOH and aluminium foil, then warm.
Effervescence is observed.
2. Test for ammonia gas with damp red litmus paper.
The gas produced, ammonia gas, turns damp red litmus paper blue.
Notes:
Always eliminate hydroxide and carbonate ions first using litmus and acid tests.
Test for nitrate only when other ions have been ruled out.
Test for Gases These procedures help you identify gases by their effects and reactions.
Phase 1: Determine Acidic, Basic, or Neutral Gas Hold damp red and blue litmus papers near the gas source. Red → Blue → Gas is ammonia (NH₃). Blue → Red → Could be CO₂, SO₂, or Cl₂ (proceed to Phase 2). Blue → Red then bleached → Chlorine (Cl₂) or Sulfur dioxide (SO₂). No change → Gas is neutral (H₂ or O₂). ⚠️ A yellow‑green gas indicates concentrated chlorine – a severe inhalation hazard.
Phase 2 : Testing Acidic Gases If blue litmus turns red (not bleached): bubble gas through limewater. A white precipitate dissolving in excess gas → Carbon dioxide. If blue litmus turns red and bleaches: hold acidified potassium manganate(VII) paper at tube mouth. Paper turns from purple to colourless → Sulfur dioxide. Paper stays purple → Chlorine. (Chlorine can also turn potassium iodide‑starch paper blue, but this confirmatory test is usually unnecessary.)
Phase 3 : Testing Neutral Gases Add a metal and apply a burning splint: “pop” sound → Hydrogen. Without metal, insert a glowing splint: relights → Oxygen.
Summary Table: Tests and Observations for Gases
Gas
Effect on Litmus
Further Test and Observation
Ammonia (NH₃)
Turns damp red litmus paper blue.
Carbon dioxide (CO₂)
Turns damp blue litmus paper red.
Formation of white precipitate when bubbled through limewater. With further bubbling, the white precipitate dissolves in limewater.
Chlorine (Cl₂)
Turns damp blue litmus paper red, then bleaches it.
Turns potassium iodide (KI) solution from colourless to brown Or Turns potassium iodide (KI) starch paper to purple or dark blue* *This is a positive test for an oxidising agent, Cl₂.
Hydrogen (H₂)
No observed change
A burning splint is extinguished with a “pop” sound.
Oxygen (O₂)
No observed change
A glowing splint is relighted.
Sulfur dioxide (SO₂)
Turns damp blue litmus paper red.
Turns acidified potassium manganate(VII) (KMnO₄) from purple to colourless** **This is a positive test for a reducing agent, SO₂.
⚠️ Some gases, like chlorine and sulfur dioxide, have pungent, irritating odours and can be poisonous. Always waft carefully, and do not inhale directly.
LOOKING FOR THE BEST PLACE TO DO YOUR SCIENCE PRACTICALS? JOIN US!
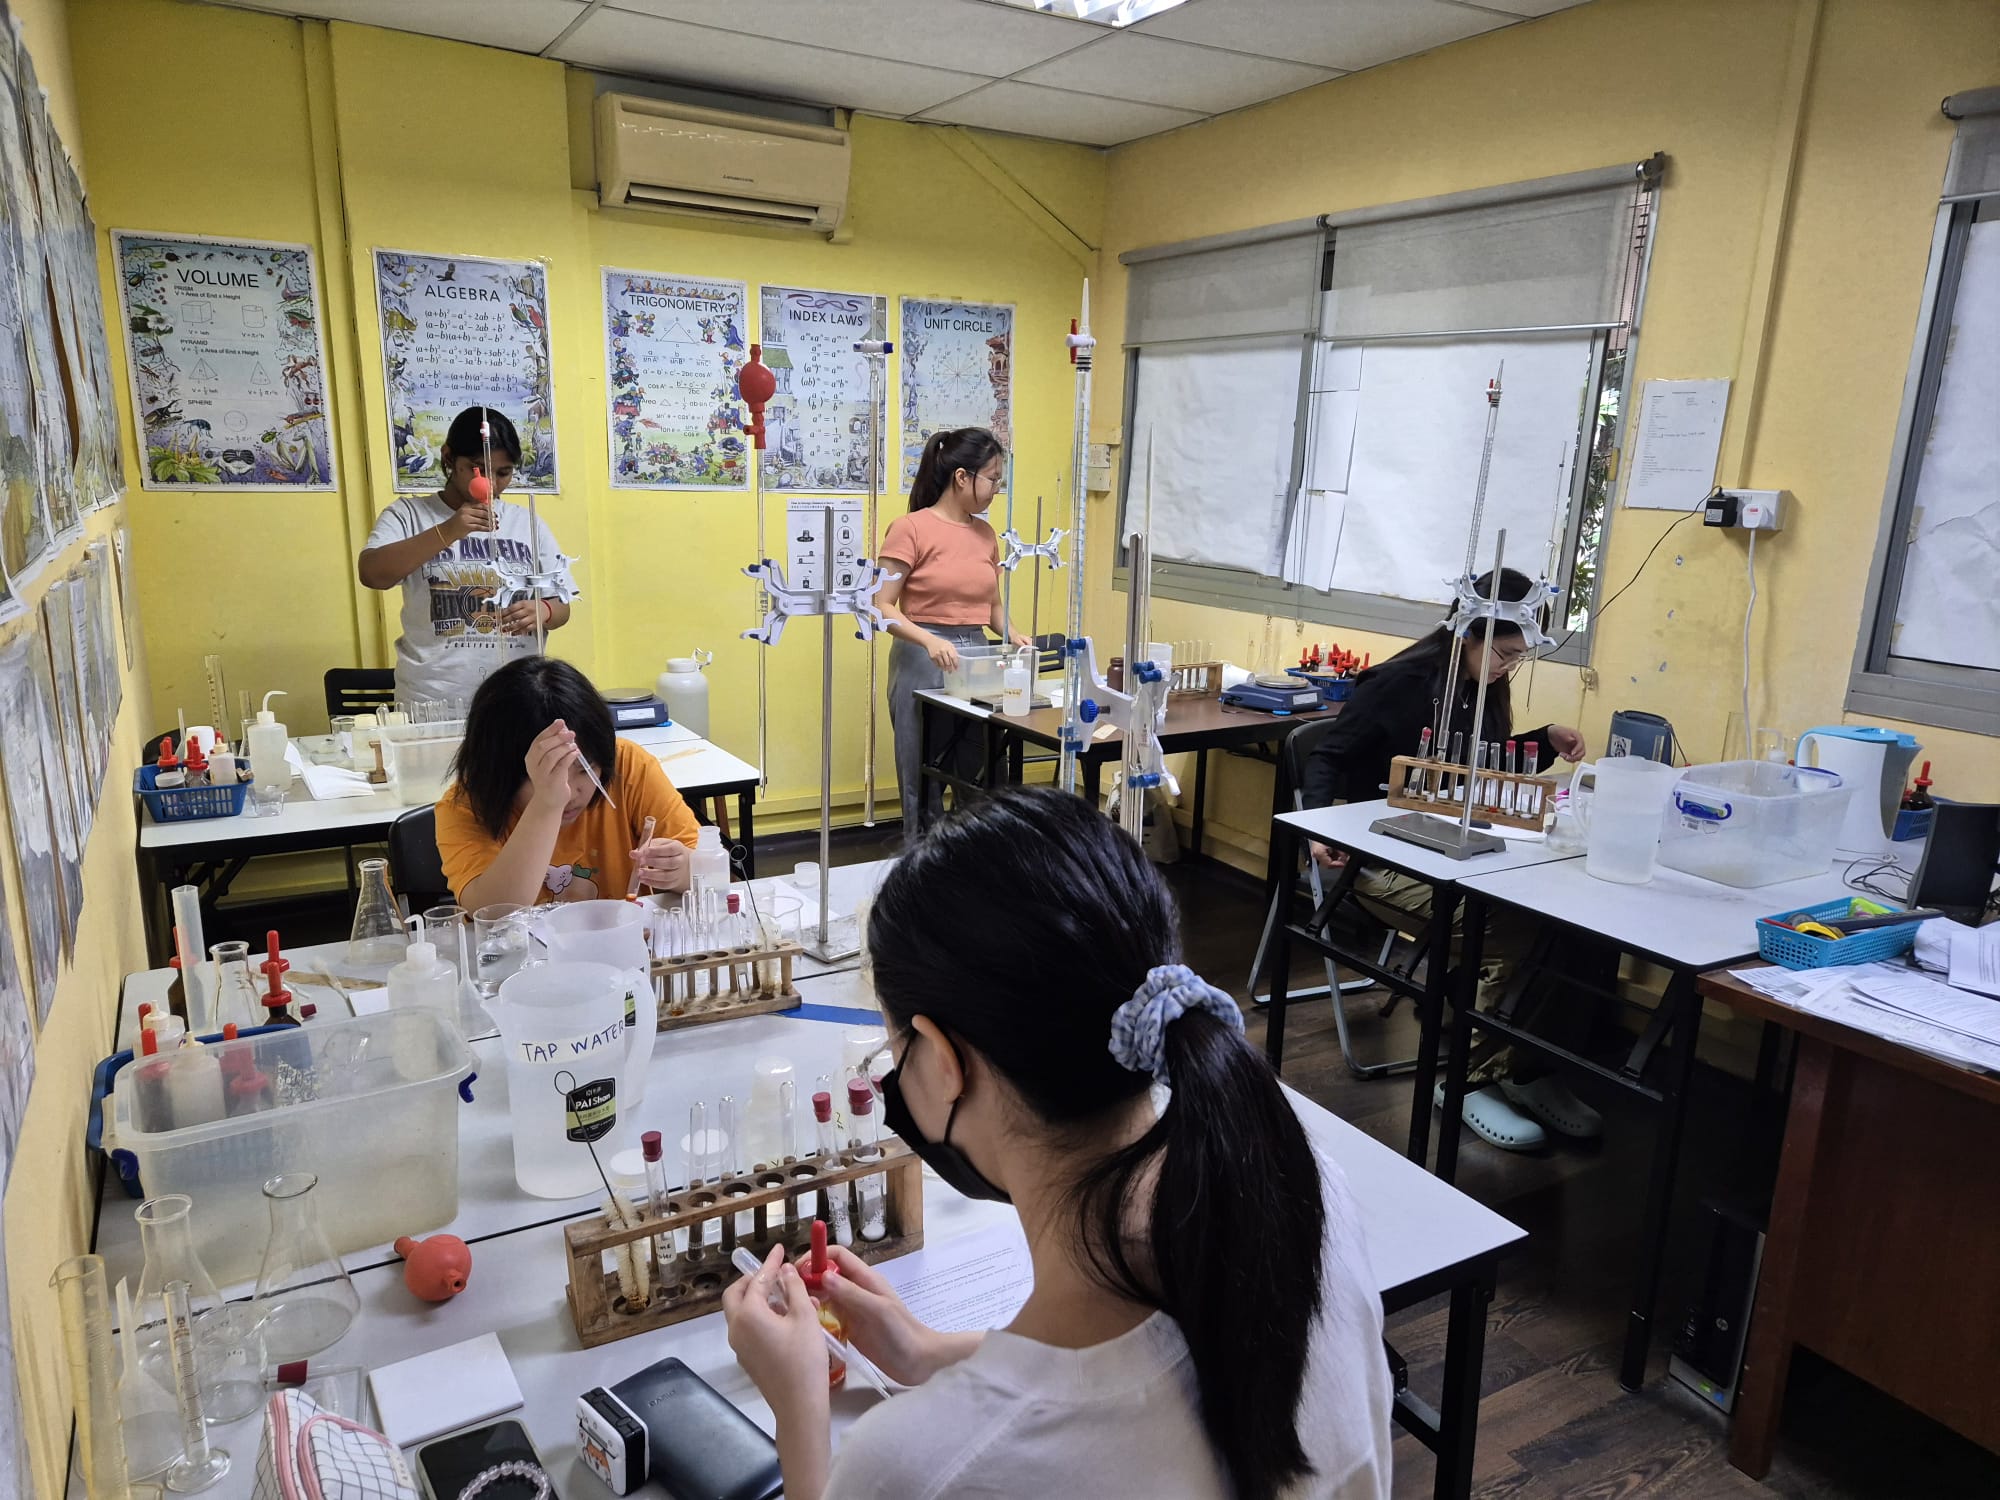
Singapore Learner has been a Comprehensive Science Practical Training provider since 2017.
As at 19 Apr 2026, we have trained about 1060 students for their science practical exams and we have conducted a total of about 4044 lab sessions.
Our laboratory apparatus are exam-grade and similar to those used in MOE schools and our chemicals are all NEA-approved.
We provide A-Level / H2 / IP and O-Level Physics, Chemistry, Biology and CombinedScience (Physics/Chemistry/Biology) PracticalTraining/Crash Course/Mock Exams for both local (eg. H2, Singapore-Cambridge) and international exams (CIE, Pearson Edexcel, IGCSE).
Why Choose Us?
Our teachers are very experienced, and we actually TEACH you good practical techniques.
We have been a one-stop comprehensive science practical centre providing solid practical training for ALL THREE sciences and for all levels and streams since 2017.
Our laboratory apparatus are exam-grade and similar to those used in MOE schools and our chemicals are all NEA-approved.
We have a structured practical training programme catering to the needs of both beginners and experienced students.
We have a small class size so that the teacher is able to observe the actions of each student more closely and demonstrate the correct practical techniques where and when necessary.
Many private schools trust us to prepare and conduct science practical training and assessment for their students, including structured training, mock exams and even actual CIE science practical exams.
Many students in lower secondary have difficulty in answering questions in history. They do not understand the nuances of the questions and how these should be answered.
Hence, despite preparing well, they are not doing well in these examinations.
This workshop is taught by an experienced teacher. He has created 3 modules to prepare the student for History in Y2 such that they will appreciate the subject. He will enable the student to know how to answer the questions in a manner that the examiners are happy with.
Module 1: Content Knowledge
a) Understanding The Big Picture – The key personalities and events that shaped Singapore’s Modern History since 1819 – Colonial Era to Independence
b) Using Effective Strategies to enhance the understanding of the key historical developments, changes, challenges and impact (outcomes) on Singapore’s growth:-
**The “Prince James Approach” to consolidate conceptual understanding
**the 5W + 1H strategy to grasp relevant details and boost mastery learning
MODULE 2: Applying the Studying skills
a) Understanding the core SBQ Skills: simplifying and structuring the “I.C.U.R.E” skills
b) Developing SEQ skills – Using the PEEL strategy to write effective paragraphs
c) Developing Annotational skills
d) Mind-Mapping skills
e) Use of Mnemonics
f) Understanding the LORMS
g) Time-Management Skills
MODULE 3: ASSESSMENT MODES
**Formative and Summative Modes
Quizzes
Short- Answer Questions
SBQ
SEQ
Research-based Questions on Key Historical Personalities and Events
Time-Lines
Oral Presentations
SCHEDULE : Every Thursday 30th Nov – 21st Dec
Time: 5PM – 6.30PM
Target Group: Current Y1 students.
Fees: $360 for 4 sessions
Registration Fee: $30 for new students
About the Tutor:
A former student from Raffles, the tutor has 26 years of experience teaching in MOE schools. He loves reading and is well versed in literature, history and social studies.
TO REGISTER, Whatsapp <STUDENT NAME> , <EL> TO 6569 4897, 88765498 (WA) http://wa.link/w0xxk2
For Practical courses, mock exams or schedules, please click on any of the following:
IMPORTANT!
Please note all the lab sessions on the following days have been fully booked:
15/3, 16/3, 21/6, 22/6, 6/9, 7/9.
To avoid disappointment, please be advised to book and confirm (via payment) your practical slots WELL IN ADVANCE as we can only take in a maximum of 4 students per session.
(1) Decide which Program or Lab sessions you need or most suitable for, by visiting the webpages of the practical subjects you are interested in.
(2) Whatsapp or Message our staff at 88765498 with your Name, Private or School Candidate, A or O level, Subject or Lab Name (e.g Lab PP2), Date and Time of Lab. (Our staff will then guide you on how to register and make payment. If you are not sure about the lab sessions, just state your Name and the Subjects and we will get back to you)
(3) Register Online by clicking below:
(4) Pay Registration fee of $30 via Paynow or funds transfer.
(5) Make the required payment for each lab session at least 5 days before the date of the lab session. (You may also pay for several sessions at one go to ensure that you will have a place in future slots)
FEES PER SESSION
Practical Training Session: $190
Mock Exam:- $240
(The full fee must be paid at least 5 days before the practical session to confirm your attendance as a lot of preparation is needed for practicals coupled with very limited class size. No refund will be given should you fail to turn up.)
If you wish to visit us, kindly call or sms first. Thank you.
You can also prepare for your practicals by taking part in our mock practical exams. Our experienced tutors will observe how you do your practicals within the stipulated time in exam-like conditions. They will then go through the practical paper and give you tips on how to save time, avoid common errors and improve accuracy of your results.
We are equipped for all the 3 sciences and take in a maximum of only 4 students per lab session. This gives a small tutor:student ratio and maximises student learning.
Location: BLK 644, BUKIT BATOK CENTRAL, #01-68. s(650644) ( 5 mins walk from Bukit Batok MRT)
For enquiries, kindly call 6569 4897 or sms to 88765498.
To do well in your Cambridge IGCSE Science exams, you should do well in the practical exams.
You can secure 20 percent of your grades for your exam through practical.
The weightage is 20% for Physics, Chemistry, Biology and Combined Science.
It is the same for the Practical paper and also the Alternative to Practical paper.
Practise for your practicals with us. Our experienced tutors will guide you and help you achieve speed and precision in your practical.
You can also prepare for your practicals by taking part in our mock practical exams. Our experienced tutors will observe how you do your practicals within the stipulated time in exam-like conditions. They will then go through the practical paper and give you tips on how to save time, avoid common errors and improve accuracy of your results.
We are equipped for all the 3 sciences and take in a maximum of only 5 students per lab session. This gives a small tutor:student ratio and maximises student learning.
For Practical courses, mock exams or schedules, please click on any of the following:
An NIE-trained Teacher, Mr Ilyas has been coaching students in O-Level & IP Chemistry, Physics and Math for more than 12 years. An alumnus of RI and RJC, he holds a Master of Education (Curriculum & Teaching) degree from the National Institute of Education, as well as a Bachelor of Science degree from the National University of Singapore.
Location 1: Blk 644, Bukit Batok Central, #01-68, S(650644).
Focus: CONCEPTUAL UNDERSTANDING & APPLICATION OF SKILLS
Format: Teaching + Worksheets + Discussions
Target Group: Current Y3 students who obtained a grade of B4 or lower in their Y3 PHYSICS SA2/EOY/Final Exam and need help catching up for 2025.
Course Outline:
Kinematics
Forces
Moments
WEP
Pressure
Latent Heat and Heat capacity
Light
Background of Tutor:
An NIE-trained Teacher, Mr Ilyas has been coaching students in O-Level & IP Chemistry, Physics and Math for more than 12 years. An alumnus of RI and RJC, he holds a Master of Education (Curriculum & Teaching) degree from the National Institute of Education, as well as a Bachelor of Science degree from the National University of Singapore.
FEE: $360 per mth of 4 sessions ($280 if sign up in Jan)
Early-bird Promotion: Students who sign up for the above before 31st Mar can opt for (a) one 1.5 hr practical lesson to replace one theory lesson per month at no extra cost OR (b) a discount of 50% to attend any number of 2 hr standard practical lessons outside of their theory lesson.
TO REGISTER, SMS <STUDENT NAME>, <SUBJECT, DAY> TO 88765498
The Tutor for our PHYSICS program is a former MOE school teacher (ex-Rafflesian) who has been coaching students in ‘A’ Level & IB Physics and Mathematics for more than 8 years, as well as ‘O’ Level & IP Physics, Additional Math, E. Math and PSLE Math for more than 10 years. An alumnus of RI and RJC, he also holds both a Master of Education degree and a Postgraduate Diploma in Education with Credit from the National Institute of Education (NIE), as well as a Bachelor of Science degree from the National University of Singapore (NUS).
Administrative Matters:
Location: Blk 644, Bukit Batok Central, #01-68. S(650644).
Our location is just a 3-min walk from either the Bukit Batok MRT station or the Bukit Batok Bus Interchange. Buses that stop along the roads surrounding our location are numbers 157, 178, 66, 506, 173, 174, 176, 187, 985. Buses services which terminate at Bukit Batok Bus Interchange are 61, 77, 106, 173, 177, 189, 852, 941, 945, 947.
TUITION CLASSES:
EDUCATIONAL SERVICES:
By EX-MOE TEACHERS & EXPERIENCED TUTORS
@ BLK 644, BUKIT BATOK CENTRAL, #01-68. S(650644).